Inverness is a really charming, smaller town. It is cute, it was cold, and it is built with a river running through it. William and I arrived in the evening during sunset so that started us off with a pretty good impression of the place. However, since it is small there is not as much to do. We chose it solely because of its location next to Loch Ness. I will be listing how we spent our time in Inverness, how much things cost, and about how much time to delegate there.
River Ness – Free
The most prominent buildings of the town are all along the river. It is really beautiful just walking down one side. There are several bridges if you need to cross from one side to the other, and the river probably is not far from where you are staying. For us, it was about a 5 minute walk if that. I got some pretty pictures during the daytime, at sunset, and at night time. You will also pass St. Andrew’s Cathedral, several churches, a few shops including a kilt shop, and the Inverness Castle (not open to visitors).
Time we spent – 1 hour
Ness Islands – Free
If you walk far enough down the river, all of the sudden there are these little islands in the middle. They are all connected by bridges, and include various nature walks through beautiful trees as well as a playground. Granted it was January, but William and I were essentially the only ones there. We enjoyed the peaceful trails and playing on the teeter-totter!
Time we spent – 30 minutes
This slideshow requires JavaScript.
Loch Ness – Free
We went to the very tip of Loch Ness, located in the town called Dores. We were able to take a public bus straight there from Inverness. I cannot locate the exact price of the fare, but it was very cheap (maybe $3 – 5 round trip?). First of all, the Dores Inn is a pub located right on the lake, and it has very delicious haggis. It also has the truly unique small town British pub feel. I highly recommend it. Secondly, right behind the pub is a walking trail that begins next to the giant Loch Ness sign by the lake. We didn’t follow it to the end, and there was no signage explaining where it went, but it basically followed the loch coast through the trees. It was peaceful, beautiful, and once again we were the only ones. We waked for about 30/40 minutes one way, and then returned. We also got to watch the sun set on Loch Ness which was really breathtaking. There are these higher peaks and valleys surrounding it that added to the scenery which was a surprise to me; I imagined it being more flat.
Time we spent – 3 hours (including dinner)
This slideshow requires JavaScript.
And that’s pretty much it. One full day in Inverness/Dores was enough to see what I wanted to see. If you like to travel at a more relaxing pace though, another day definitely would not hurt. Also, I’d like to highly recommend the Bed and Breakfast we stayed at – The Quaich. The rooms were nice, the host was kind, and the breakfast was so yummy. It really added to our pleasant Inverness experience.
If I were to go back to this area, I’d specifically want to either:
Go back to the hiking trail we found at Loch Ness, and consider camping. Either that or allow a full day of hiking in the area.
See other parts of Loch Ness. Urquhart Castle and Fort Augustus are more common Loch Ness viewing sights, but they were harder for us to get to with such little time and limited transportation.
I’ve always liked taking pictures. I remember when I went to Washington D.C. on an 8th grade trip with my school, it was my first time to go far away without my family. It was also the first time I got to be in charge of the camera! I took 800 pictures over a 4 day period. Most of them were bad, several were just while driving by on a bus – blurry and importance forgotten. But it was the beginning of something.
When I went to France a few years later, we were 7 days into a 10 day trip when my camera was stolen. I had over 1,000 pictures on there. My whole purse was snatched, and the “remains” were found about an hour later. My phone, my money, and my camera were all gone. I was fortunate though that they at least left behind my passport and a visa gift card. Still, I was heartbroken and crying. Firstly, because I was afraid of getting in trouble with my parents. I did not enjoy making that phone call, though they were sympathetic. But mostly, I lost all of the memories from my perspective.
Now that I have taken literally thousands of pictures abroad, I’ve been learning and developing my photography skills. I am most definitely an amateur since I have no formal training. But more and more often I am capturing photos that I am truly proud of and like sharing.
I started off mainly only taking pictures of buildings. I love cool architecture, and that’s why I enjoy sightseeing buildings and monuments in the places I go. I used to take just head-on shots. I’ve since discovered something called getting the “right angle.”
I also still take a million photos, just because the more I have, the more likely I’ll have some decent shots.
But the main thing I’ve discovered more recently, is that my favorite photos always end up being pictures of people. The pictures I take of people are always attached to a memory. Whether it was a conversation I had with them, or just simply observing a cultural custom – these photos bring along the joy of being in the moment. The tricky thing is though, that I’m pretty shy. I don’t feel comfortable always going up to people. Sometimes I’m afraid they will interpret what I’m doing in a negative way. So often, my photos are snapshots that I took with my camera still around my neck at my waist. My sneak shots. Oftentimes too though, the people I’ve met are the ones who started engaging with me, making it easier to take a great photo of them.
I have some below with a little story attached to each one. I want to start with the man that inspired me to write this post though. This man below was in the Old Town Market in Hyderbad, India. As I was walking through the market with my guide, I VERY clearly stood out. I was white. I was dressed in Western style clothing (as in American, not cowboys). I wanted to take pictures in the market because I found it very lively, interesting, and beautiful. All the foods brought out so many colors. All of the fabrics brought out colors in the saris, and the representation of different religions (primarily Islam and Hinduism) was very apparent. However, I didn’t want people to think that it was just another tourist attraction for me. If I snapped a photo of them, I was afraid they wouldn’t understand the amount of respect and appreciation I had for them. I remember going through a market in Haiti, and several people not wanting to be photographed. So I tried to take some of my “sneak shots,” and even those were few and far in between. As we were exiting the market for the main road, this man started talking to me in Telugu. I had no idea what he was saying, and I had actually assumed it was something negative about me being there or having a camera. Then my guide translated for me…”He wants you to take his picture.” It took me a second to process, but I then proudly and happily picked up my camera and snapped a shot. Then he smiled, we waved, and I continued on. It was so simple. And I don’t why he cared; he wouldn’t ever get to see it. Maybe he just noticed how few pictures I was taking and was helping out. Maybe he wanted to show off his lifestyle and culture to my people back home. I don’t know! But I’m so glad he reached out to me.
The following photos were from my most recent trip in Japan. Three of the pictures are from my experience observing the traditions of visiting and praying at the temples. The one with the two boys running was when school released for the day, and the kids were running home. The yellow hats were part of their uniform. Last but not least, the cute baby was staring at me the ENTIRE time I was watching the water parade at the DisneySea park. He was so adorable; I just had to snap a photo to remember him by.
This slideshow requires JavaScript.
I also visited India this year, and since the nature of the trip was very focused on meeting locals, I had many opportunities.
This slideshow requires JavaScript.
I have some others below.
Appian Way in RomeSwiss Guard at the Vaticanlocal market in Leogane, HaitiIn Haiti, we went on a scavenger hunt through the market. He had one of our items!These girls and boys came up to our group at the beach, and we painted their nails!A Shipibo girl in PeruShipibo childrenShipibo monkey
I know the monkey isn’t a person….but he’s just cute.
I love food. The older I get, the worse my obsession is becoming. It’s what I like to do for fun. When I first started traveling on my own (as in, without my parents), I didn’t care about what I was eating. But over the years, I’ve increasingly dedicated more and more of my budget to trying different meals, desserts, food, tours, etc. while traveling.
Below I am listing experiences I’ve had outside of the United States where either the food was absolutely delicious, or the experience was unforgettable. These are in no specific order.
1st Memorable Meal – Scones; Bath
When William and I were in the United Kingdom, we went on a tour by bus that took us to Windsor, Stonehenge, and Bath all in one day. While in Bath, we basically were just dropped off to do what we pleased with our time. Our guide, David, had mentioned on the bus ride to Bath that he would be spending his time in a scone shop right behind the Bath Abbey. He said he had already called in advance to make sure they had lots of scones. He also talked about how much he loved them, how they would be fresh, etc.. My priority was seeing the Roman Baths and the Bath Abbey, so I thought we would only get to try a scone if we had enough time. Luckily, we did (barely). David was in there and we joined him with a couple of other Americans. The American guy started to use a knife to break his scone apart, and David exclaimed, “No, no, no, no, no! Jesus broke the bread with his hands; you must break the bread apart.” Sure enough, it broke perfectly in the middle. Then he taught us that you spread the jam, but just put a “dollop” of cream on top. You don’t spread the cream. All of this was apparently symbolic, and the order mattered (upon further research though, I know other parts of England put the cream on before the jam). This scone was literally not only the best scone ever, but one of the best pieces of bread I’ve ever had in my life. I think about it all the time. The rest of my trip in the UK, I kept buying scones in other places but they never were the same. I tried to buy all the ingredients here back home but failed miserably at creating even a semi-close attempt to what these were. I did not remember the name of the shop, but after walking on Google maps, I believe it is the shop called The Mad Hatter’s Tea Party.
Bath Abbey
2nd Memorable Meal – Anticuchos; Lima
On my trip to Peru, I had read that anticuchos (cow heart) was a popular dish there. I wasn’t sure how I felt about trying that prior to the trip, but once I had been in Peru for a week and felt really comfortable, I wanted to test it out. The only problem was I was out of time and on my way to the airport. My group and I had an excursion in Lima at the Indian Markets, and across the street there was a little mall. We tried running around to see if we could find any place selling anticuchos but failed. Then we were on the bus going back to the airport, so as a desperate last attempt I asked the guide if he knew a good place in the airport to try it. Luckily, he did. He recommended a Peruvian restaurant in the food court just after security called Manos Morenos. My friend Randy and I ordered a meal’s worth, and it essentially just looked like steak on a kebab. It came with a sauce – I have no idea what it was. BUT IT WAS GOOD. The sauce was delicious. The anticuchos was delicious. If I ever go back to Peru, I will be ordering that a lot more often. It wasn’t the best meal of my entire life, but the fact that something that seemed scary and weird was so tasty, and that I was brave enough to try it, made it very memorable for me.
This slideshow requires JavaScript.
3rd Memorable Meal – Food Tour; Rome
In Rome, William and I went on our first ever food tour. I highly recommend this tour, but make sure you are starving when you arrive. We all met up at a metro station and then walked to our first stop, a Sicilian coffee shop. We tried coffee there, and even though I don’t care for coffee, I actually drank my whole cup. If someone forced me to drink coffee, I guess I would prefer Italian! We also tried a cannoli and it was magical and amazing (we returned to the shop later in the trip for one!), but more on cannolis in another post. Our next stop was Bonci’s, a “fast food” pizza shop. Bonci is a famous, TV featured chef, and one of his main beliefs for making his pizza is that you should always stick to just 3 ingredients on top. However, think more outside of the box than what Americans typically put on pizza. The ingredients varied from different types of greens to macaroni and cheese. And they all were so good. Each person in the tour picked a type of pizza available at the time, and then we all got to try each other’s. There were some that sounded gross to me that ended up being amazing. William and I returned to Bonci’s because we were so impressed. We wish we had one here! A good tip for ordering pizza from these places too, is when you ask for your piece, you need to tell them an approximate weight (or at least show how big of a piece you want with your hands). It’s basically just a giant rectangular pizza and they cut off however much you want, and weigh it to price it. Continuing on, we went into a little shop to try different jams, spreads, truffles, and cheeses. I learned about the importance and deliciousness of Buffalo Mozzarella Cheese. The cheese was so fresh (for cheese anyway), and I didn’t think I would like combining the truffles and jams with the cheeses but our guide knew how to make the perfect tastes blend together. We visited a butcher and cheese shop, and then continued onward to try different meats like prosciutto. I’ve never had meat literally just melt in my mouth the way these slices did. We continued onward again to a place where we tried various pastas. I wasn’t as impressed with the pastas (I’m a red sauce kind of girl and none of these were). However, William ended up discovering Carbonara pasta. He loved it so much, he ordered it for every meal on the rest of the trip. Finally, at the end we stopped by a legitimate gelato place that makes it fresh and had a wide variety of unique flavors. I tried a blueberry with some type of Southern American chocolate. This tour was amazing, and really filled you up. Our guide was kind too, as well as the Welsh couple that joined us. We even all hugged and kissed goodbye at the end. I also loved this tour because our guide was so knowledgeable about food, the Italian laws behind food, where food came from, what different regions of Italy were known for, etc. It was so much to take in, but so absolutely interesting!
4th Memorable Meal – Grilled Cheese; Copenhagen
I visited Denmark in January, and on this particular day I had spent a lot of time outside. In the morning, I caught a bus to visit the Little Mermaid statue just off the river. Then I wandered along the coast through a park, back into the city, visited a castle, and then had been walking on wards for about 15 minutes to reach the SMK Art Museum. I was hungry, I was cold, and I was praying that the museum had food inside because I didn’t see any restaurants near me. They luckily had a café next to these giant glass windows overlooking some beautiful scenery. I ordered a grilled cheese and hot chocolate. It was such a relaxing meal. I was at peace, I was warm, and the grilled cheese is the best I’ve ever had. I think they used several different types of cheeses. The hot chocolate was on par as well.
5th Memorable Meal – Kawaii Monster Cafe; Tokyo
The Kawaii Monster Café is really touristy, I’ll admit. It is located in Harajuku in Tokyo. The food was not that great and it was expensive. However, the theming and experience were awesome! We were fortunate enough to go during a time that was not too crowded at all. The concept is that you are entering through the monster’s mouth. Then once inside, there are 4 different themed rooms you could be sitting in: Mushroom Disco, Milk Stand, Bar Experiment, or the Mel-Tea Room. We sat in the Mushroom Disco area because it looked the coolest in the pictures. They do allow people to wander the restaurant to take pictures though, so you can definitely see all the spots. There is also a giant carousel in the middle, and the various workers there are “Monster Girls” who are dressed in crazy costumes. They put on a dance like show on the carousel every so often. It wasn’t super impressive, but still fun to watch. The food and drinks are also very colorful and neat looking. William ordered a green monster burger, and I got pasta that was rainbow colored! William also ordered an alcoholic beverage that came with blue and red phials, and he had to pour them in to mix his drink while looking like a mad scientist. The Kawaii Monster Café is definitely cool to check out at least once.
This slideshow requires JavaScript.
I’m hoping to have several more amazing food experiences in the future. Specifically, I’ll be in Thailand next summer. If anyone has any recommendations, please let me know!
Last week I went into depth about how I booked the flights, apartments, and hotels for our honeymoon in Italy in 2016. Due to the length, I broke this budget analysis into 2 parts. This week, I’m giving a glimpse of what we spent on transportation (in Italy), attractions, and food. If you missed last week’s post, check it out here!
Overlooking Naples and Mt. Vesuvius
Transportation:
First, I will start with Naples. From the airport, there is a special bus called the Alibus that only runs between the main train station, the port, and the airport. It is only 3 euros in one direction, but it’s difficult figuring out if you don’t look anything up in advance. You have to buy the ticket inside of a tobacco/gift store in the airport near the exit. Then you have to walk out to the left for a bit. There was a sign, however the area was under construction! We quickly learned that apparently, the temporary stop had been moved across the street. We managed to figure it out with the help of other tourists and made the bus. It was a quick, direct ride. We got off at the train station because our hotel was about 1 minute away by walking.
For the rest of Naples, we mainly traveled on foot from site to site. It was A LOT of walking. Naples does have a subway system consisting of a few lines, but we only hopped on once during our 2nd day to get to Castel Sant’Elmo. The one way ticket was 1.50 euros.
We walked up a giant staircase of death, not realizing in advance that this castle was on a mountain. It took about 30 minutes. I don’t really recommend anybody ever do this, so if you want to visit – know that there is a funicular that can take you up! It’s worth the fare.
Said Staircase of Death
View from the top
We only took a public bus once, with a transfer. I can’t really advise people on the bus system there because we had NO IDEA what we were doing. I had looked up routes in advance on Google Maps, but then nothing matched up. I couldn’t find the stop I had looked up back home, so I bought fare at a different stop and they gave me a confusing map. None of the routes even had the same names as what Google told me. So then I was trying to figure out where we were on the map, and what routes seemed to take us to the museum we were going to. Of course, I only have like 30 seconds and a bus pulls up so we decide to hop on and hope for the best. I realize which direction the bus is going and follow the route on the map, trying to figure out when to make the transfer and where that transfer will be in real time. A man noticed that I had been looking at the map intensely, and spoke some English. He started up a conversation with me, asked me about where I was going, and told me he was making the same transfer so I needed to follow him. Then we had small talk, started chatting with a woman next to us who only spoke Italian (so he became our translator), etc. When it was time, we all got off together and realized our bus was already here, except it was around the corner and across the street. They all start running so we just started running with them! We all make the bus, and then we find out he has to get off before us. He keeps counting “1,2,3 OFF!” So that we know how many stops to wait through. However, at one point he starts yelling at the bus driver and lots of people became upset. We thought it was because the bus driver had missed a stop, so we took that into consideration when we counted when to get off. We ended up getting off at the wrong spot, but the Italian lady literally came off the bus to get us and put us back on. Sure enough, one more stop and we are RIGHT in front of the museum.
Literally would not have made it without the nice Italians!
Needless to say, that was our only journey on the bus in Naples. The fare was also 1.50 euros per person.
We did go from Naples to Pompeii and Mt. Vesuvius in a day trip, but transportation was included in the package we booked. I will be counting that money towards attractions.
Pompeii
When we transferred to Sorrento, we took a cheap train that made several stops just like a subway all the way there. This only cost 4.50 euros. This train is called the Circumvesuviana. This train is notorious for pick pocketing (as is the Naples train station, Naples in general, and Italy in general). Be very, very careful with your things. I personally feel like I had a couple of people eyeing me closely and we met a tourist that had her phone stolen. It gets very crowded just like subway trains too.
In Sorrento, we could walk everywhere in the city. We did take one taxi from our hotel back to the train station because we were running late to the train station that morning. Even though the Circumvesuviana runs several times each hour, we had to make it to Naples pretty early in order to make our other train taking us to Rome. This was a very short taxi ride though, and only cost about 20 euros.
When we went to Capri, we went on an excursion that included the boat travel to the island. On the island, since we were short on time and wanted to see Capri and Ana Capri, we took a taxi between the 2 cities. The taxis there are convertibles too! And it’s so beautiful and mountainous; it’s very much worth it at least one way. They do have public buses, but those obviously take longer. We barely had enough time to fit in everything we wanted so take into consideration how much time you have on the island. The taxi fare was exactly 20 euros each way.
Convertible Taxi in Capri
We toured the Amalfi Coast on an excursion that included minivan travel to the cities of Positano, Amalfi, and Ravello. You can also take public transportation, but then it is not realistic to expect to get to all 3 of these cities and back to Sorrento in a day. In each city, we only walked around.
Now Rome…..Since we were in Rome for 6 days, and it’s much larger, we bought an all-inclusive week long public transportation pass. It was 24 euros, and it was WELL WORTH THE MONEY. We used public transportation so much. Rome has 2 subway metro lines, lots of buses, as well as a couple of other trains (we didn’t understand what they were even at the time). We did indulge in one taxi ride after a late night, which was about 20 euros.
Our apartment was about a 30 minute walk away from the closest metro station, which was just north of the Vatican. There was a bus though from that station, but since it ran less often than other buses, it only came by once every 30 minutes. We know, since we tested it several times. There was a Serbian lady who could not believe the wait times and asked the locals about it, and that’s how we found out it was a less-used route. Other buses run more consistently, especially ones tourists normally will be using. To be honest though, we did not use the metro very often. It’s not actually that convenient. We either walked or took buses for the most part. What I love about Rome buses is that all of the stops are easy to see and well labeled with the route listed out, as well as all the buses that stop there. So I could just walk to a bus stop and figure out my route from looking at the sign. We actually got home that way once!
The Roman Forum
We also took a couple of regional trains, but just through a couple of stops in Rome. There were no ticket scanners so we just hopped on and hoped that the passes were valid on those trains (the train station was closer to us than the metro). Finally, on our last ride, we had a person coming through the train checking tickets. We discovered that our passes were valid on those trains as well!
We also took a train from the Rome suburb Ostiense to get to Ostia Antica. It was the Lido train, and it was still included in the weekly pass as well.
To get from Naples to Rome, and from Rome to Pisa, we took regional trains that I had purchased fares for online. The gamble is, even though you guarantee your seat and prices are better, apparently Italy has train strikes a lot. Sometimes, it is better to be flexible and see what is going on once you get there. I’m such a planner though, I hoped for the best and it worked in our favor. Naples to Rome was about $25 a person, and Rome to Pisa tickets were about $35 a person.
Finally, in Pisa we just walked everywhere. We only got on a bus once to take us to the airport. The ticket was 1 euro.
Pisa
So to calculate my transportation total, I’m counting the euros the same as US dollars since they were so close to being equal when we were traveling.
Cost of transportation per person: $140
Attractions:
In Naples at the train station the first morning we “set off,” we went to an office in the train station to buy the Campania Art Card. There are different options, but we bought the 7 day pass that gets us into 5 of the included sights free, and the 6th one at ½ off. I had done the math though and was very strategic about where we used it, and where we would just pay a fee separately (use the pass for the more expensive places). We used ours to get into the following: Royal Palace (12 euros normally), the Bourbon Tunnel (10 euros), Castel Sant’Elmo (10 euros combined with Museum), Certosa e Museo di San Martino (10 euros combined with castle), and Teatro di San Carlo (7 euros). The Castle and the Museum were supposed to be combined for one entry, but we somehow screwed it up and got it counted twice unfortunately. The Naples National Archaeological Museum (12 euros) ended up being our ½ off one, but the original plan was to get into this one as well with the card for free, and then getting ½ off of Villa Cimbrone (7 euros) in Ravello a few days later.
Royal Palace
The card was 34 euros a person. We would have otherwise spent 58 euros a person.
We did splurge on tours for this trip. We did one taking us to Mt. Vesuvius as well as Pompeii. This included round trip transportation, a guide for Pompeii, and lunch. It was $105 a person. You could use the Circumvesuviana train from Naples to get to these locations, and then pay the 11 euro admission at Pompeii, and the 10 euro admission at Vesuvius. It would just take a lot more time and be more difficult to do all in one day.
We did a tour that included our boat transportation to Capri, as well as a sail along the coast, a stop for swimming, beer and limoncello, and transportation to the Blue Grotto. This was $93 a person. If you were to do this one on your own, it is about $55 round trip for the ferry alone. Then getting to the Blue Grotto would have taken additional transportation on the island.
Our ride to Capri
Finally, we also did an Amalfi tour to help save time. It was mainly just direct transportation to Positano, Amalfi, and Ravello. We got dropped off in each city to do what we wanted. Our driver also stopped for many photo ops, was very knowledgeable about the area, and lunch was included in Ravello. Since it was William’s birthday, he even surprised the group with some Prosecco. This tour was $87 a person. Bus tickets are very cheap, but then you would probably need to have an additional night in the area to see everything we saw (which adds up in the end).
In Rome, for all attractions we either bought tickets online in advance or paid at the door. I had looked into the Roma Pass, but it simply was not beneficial for what we were doing. In addition to just admission to places, we did do an underground Scavi tour in the Vatican, as well as the underground and third ring tour at the Colosseum.
In Pisa, everything was free except the main things by the Pisa tower. We were able to buy this in a combo ticket for $23 per person including the tower climb.
So our grand total per person does include some transportation costs and meals since it was combined in tours.
Cost of attractions per person: $477
Naples
Meals:
I LOVE Italian food. So we cut back so much on airfare and lodging, I will not lie – I did not hold back on the food here.
Breakfast – In Naples, every morning we walked to the train station. I would always just get a couple of pastries from the bakery and William would always get something from McDonalds. In Sorrento, food was included with our hotel stay. Our Airbnb provided food for breakfast in Rome. So we only bought a breakfast meal in Pisa our last morning in addition to Naples.
Breakfast Total per person: $40
Eating my morning pastry (cannollis count!) in Naples
Lunch and Dinner – When we did sit down in a restaurant, we usually spent about 40 euros on a meal for both of us. However, sometimes we were tired in the evening and just grabbed fast food or groceries to eat in our room. Sometimes, we kind of skipped lunch and just snacked throughout the day. This is the hardest one for me to estimate, but I believe we probably spent around $300 a person on all food other than breakfast and what I’m about to mention below. Could have definitely spent less. But I wanted gelato and pasta everyday!
While in Rome, we also did a food tour which was money WELL SPENT. We had coffee, cannolis, meats, cheeses, jams, truffles, pastas, pizzas, and gelato. I had SO MUCH FOOD I literally got so sick later but it was so worth it. Wow. Our only regret was not doing the tour sooner on the trip. This was $99 a person.
We also signed up for our first Eat With experience at Barbara’s. We went to an Italian’s home in Trastevere, and enjoyed her home cooked meals with wine and company all night long. This was $75 a person, which helps to supply all of the ingredients, wine, and Barbara herself!
Drinking wine with a local Italian man and a family from Tel Aviv in Barbara’s home
Cost of food per person: $514
Summary:
The grand total is $2,041.50!
AK, THAT’S TERRIBLE. That is not saving money at all!
It was my honeymoon, give me a break. It’s also important to take the following into consideration:
I went into this trip knowing that I had honeymoon gifts and money from the wedding to cover things (included in the total above). About $800 of that per person was covered for us – bringing the cost down to almost $1,200 per person total for EVERYTHING.
I didn’t have to pay for hotels. I could have booked airbnbs, hostels, or used hotel points (potentially reducing the cost by $835.50 per person).
I also got so many miles from the hotel bookings that I have enough for a free one way flight in the states.
Time is money. I splurged on tours to mainly save on time that would be lost if I got everywhere myself. You could cut back several hundred just from that. If you do want to do a tour though, you could look into using certain credit card points to cover those as well.
I love food. We ate all the food we could ever want and more. If you stick to grocery shopping, just getting a light pastry in the morning, making your big meal of the day lunch as opposed to dinner (more expensive), being okay with standing to eat, etc. you can definitely do it for cheaper than we did. Also, don’t pick places with pictures of the food or where the menu is translated. If you are near a super touristy area, walk a few blocks away before looking for food. We were bad about this because we always waited until we were starving and on our death beds before looking for a place to eat. Therefore, we settled quickly. Some research in advance or looking on yelp could help too. Obviously, skip the food tours too if you are on a tight budget.
We did every attraction under the sun in these parts of Italy. A lot of them start to feel repetitive. If you just stick to what you really care about seeing, and what is free, that will also help. You can have an amazing time in Italy just wandering around for free.
I know this post is lengthy, but there is really good advice and ideas you could use on your trip. A lot of these things I had to really dig to find, or didn’t find out until I was there. I know quite a few people have already been to Italy too, so if you have anything to share, PLEASE do.
This blog post’s purpose is not to solely provide entertainment, but to present a realistic breakdown of expenses spent on a trip. The goal is to help create ideas on how to cut back, help set expectations, and to see how my money was spent based on airfare, lodging, transportation, attractions and meals.
Italy is at the top of most people’s lists for places they want to see the most. For me, I remember seeing the pictures of when my former youth pastor and his wife went on their honeymoon there. I couldn’t believe it – how could anything be more romantic than honeymooning in Rome? Especially since I had thoughts of riding on the back of a moped with a handsome man just like Lizzie McGuire did in her movie.
Well, dream accomplished. I had told William from the get-go this is where I wanted to go, and he was onboard with the idea. We went in April 2016. I have our general outline of how the trip went below for reference.
04/15/16 – Flew out of DFW
04/16/16 – Arrived in Naples after a layover in Frankfurt AND a layover in London (that required us to switch from Heathrow to Gatwick airport in 3 hours – yikes) – evening
04/17/16 – 04/18/16 – 2 full days exploring Naples
04/19/16 – Day trip from Naples to Pompeii and Mt. Vesuvius
04/20/16 – Train to Sorrento in morning, full day in Sorrento
04/21/16 – Day trip from Sorrento to Capri
04/22/16 – Day trip from Sorrento to Amalfi Coast (Positano, Amalfi, and Ravello)
04/23/16 – Train to Rome in morning
04/24/16 – 04/28/16 – 5 full days in Rome
04/29/16 – Train to Pisa in afternoon
04/30/16 – Pisa, leave for airport in evening. Fly to London for overnight layover
05/01/16 – London to Madrid, then finally home
Plane Tickets:
Because it was our honeymoon, my gracious, thoughtful, awesome in-laws gave us miles to book the flight with! William’s dad flies multiple times a month for work so he racks up a lot of American Airline miles. We went with the Economy MileSAAver redemption, which is the lowest amount of points possible that you can use to get from point A to point B. They are not available every day, so you have to be flexible with your dates. At the time, this was 20,000 miles per person each way. So for both of us, this would total to 80,000 miles. American has increased this award to 22,500 miles each way now though (90,000 round trip for 2 people).
Even when you book with miles, you will still have to pay various taxes and fees associated with the ticket. When I currently looked this up on a similar flight, this was about $150.
Keep in mind, if you book through American Airlines, avoid long flight segments that are on British Airways. In my case, I had to make sure my flight going over the ocean was not a British Airways flight. They charge you the fuel surcharge on top of the miles redemption, so this can change that $150 fee to a $600 one.
If you don’t have people in your life with tons and tons of miles to spare though, you can sign up for a credit card with a good bonus. Some examples are:
Citi American Aadvantage – currently a 60,000 mile bonus, and the annual fee of $95 is waived for the first year.
AAdvantage Aviator Red World Elite Mastercard – currently a 50,000 bonus with an annual fee of $95 NOT waived. Clearly, the first card would be better but I already got it so this is appealing for me.
Starwood Preferred Guest – currently a 25,000 point bonus, and the annual fee of $95 is waived for the first year. Every 20,000 points that you transfer (at a time) to American Airlines racks up an additional 5,000 mile bonus. If you would like more information on this card, send me your email on my Contact Me page. I have a special referral email I’ll send to you!
Make sure though you are careful with your credit, and have a score of at least 700 before applying.
Cost of airfare per person: $75
Lodging:
As a honeymoon present, we were able to upgrade for a bit of our stay in Italy as long as we kept it under $200 a night, and I used Rocket Miles to book these hotels. Why? Because they bonus me extra miles to the account of my choice just for booking through them. The prices for the hotels are similar to other hotel booking sites; the only difference is there are not as many options. The bonuses are always at least 1,000 miles but can go up to 13,000. Keep in mind, this is for the reservation (not per night).
In Naples, I found the Ramada Naples conveniently right next to the train station. After all taxes and fees were factored in, this cost $172 a night for 3 nights. I earned 516 miles through my credit card for making the reservation, and then I got a bonus of 9,000 American Airlines miles deposited to my account; 6,000 for the actual reservation and 3,000 for it being my first booking.
Train Station in Naples
In Sorrento, we stayed at the Hotel Corallo for 4 nights at $183 total a night with all taxes and fees. So in addition to earning 731 miles on my credit card, I also earned a bonus of 6,000 American Airlines miles.
View from the room at Hotel Corallo in Sorrento
For the rest of the trip, we were on our own so I chose to book our lodging through AirBnb! In Rome, we stayed 6 nights in an apartment located within walking distance of the Vatican. It had a full kitchenette, a patio with a garden, neighborhood cats, and it took a million keys to get inside (very secure!) The host was very kind, even though she didn’t speak much English. There was also food to make breakfast and many guide books inside (and a map)! You can check her place out if you are looking at Rome here.
We paid about $61 a night, totaling $365 for the whole stay.
Finally, in Pisa for one night we also stayed at an AirBnb location. It was $58 for the grand total. Never met our host, but it was a great location.
Our Pisa apartment
Cost of lodging per person: $835.50 (but also earned 16,247 miles just through 2 hotel bookings. More than enough for a one way domestic airline ticket).
All of my Italy budgeting, especially transportation, ended up being some rather lengthy writing. I’ve decided to end this post here, but next week I will include more information on the cost of transportation, attractions and food. I will also reveal the grand total!
I am always reading about these wild stories that people have on their travels. From partying and drinking with once strangers now turned friends to being invited by locals to eat dinner in their homes, I’ve always thought it sounds so magical and fun and exciting. I think to myself, I want to be like that!
But then reality sets in. I know bad things can happen too and I get scared. Can I trust these people or not? I’m also shy. I don’t really initiate conversations, and until just 3 years ago, I didn’t usually meet people while traveling. The more and more I do it though, the easier it gets. The more I’m choosing experiences that put me in a place where I can interact with others. I’m feeling more comfortable, and recently in Japan we had an awesome experience with some newly found friends.
When we went to Italy, we did a food tour in Rome. It was our first ever food tour and WE LOVED IT. I want to do one practically everywhere we go now! So when I received an email from Viator saying that a Tokyo Food Tour was currently discounted, I jumped on that deal immediately. This food tour was in the evening, and our guide Kiri was amazing. He was so helpful, kind, informative, and generous. Kiri took us to a restaurant to try yakitori (yum), a pastry shop, and a third stop to try Monja.
The food tour ended around 8pm. We were all in the train station, and William and I are under the impression that we are about to call it a night. We had talked to most of the people on the tour and really enjoyed their company. Then, the British couple asked if we wanted to go out and have a few drinks. I’ve already spent 3 hours with them and know they are awesome. They invited two Australian girls too. We had Kiri help us figure out what area we should go to, and how to get there by train. We ended up heading to the Roppongi area in Tokyo, which is known for having a ton of restaurants, bars, nightlife, shops, you name it. Once we arrive though, of course we don’t know which one to pick and just keep aimlessly walking down the street. We see a patrol officer (who very clearly does not look Japanese, so we hope he speaks English), and ask him for advice. He recommended a British pub right across the street. So we try it!
The pub was crowded, tiny (like the size of a bedroom), and we find a little spot at the bar with 3 chairs where we all huddle around until a table becomes available. We can’t really read the menu so most of us just select drinks based on pictures (or maybe that was just me). I had something that was neon green, but tasty. We take pictures, we eat the free popcorn on the table, we drink, and we are merry! The British couple decide to buy the round of drinks, and we just think it is too funny that British people are buying us drinks in a British pub in JAPAN. Then we come up with the idea…..maybe we could find an Australian and American themed bar too.
Turns out….there was an “Australian” bar 5 minutes away! And off we go to find Quest. We have to go up the elevator, and we see a regular looking bar. We see nothing Australian about it, so we ask if this is the right place. The Japanese man says, “Yes. Good day, mate!” with a pretty horrible accent. I guess we are here! The Australians proceed to go around the entire bar to actually find anything Australian. They only found 2 things (and this bar was quite a bit bigger than a tiny room). The Australian girls decide to buy this round of drinks, and find a lone American at the bar named Steve that they invite over. Steve informs us that the British Pub we just came from is where men go to find their ladies of the night. Whoops. People keep coming over and introducing themselves to us (we kind of stand out). We got to see a wedding party come in and have a blast. Then we work on finding the final bar location of the night….an American bar. It can’t be that hard, right?
Wrong. We couldn’t really find anything! We did find a Texas themed bar, but it was about 22 minutes away by train. We needed something closer as it as getting pretty late. Eventually, after about 15 minutes of googling I find something called The Elvis Bar. There is very little information, no picture, but it was only a 1 km walk away. And Elvis is a very American icon so surely it counts! The group is down so we make the walk, and find that Steve decides to tag along.
We get to the place labeled Elvis Bar on Google Maps and find nothing. Like I said, I’m shy and don’t like asking for help. I easily give up mentally. However, the British man is very friendly and great at talking to and approaching people. He finds a couple of Japanese men that look like hard core rockers with their spiked hair and leather jackets (may be exaggerating a little) and asks them for help. They don’t speak English so Elvis dancing and singing impersonations commence. Eventually, we are on the same page and these Japanese men start running around the whole area with our phones while the 6 foreigners follow aimlessly. I must give them credit – they were absolutely dedicated to helping us. I was already ready to give up. Three from our party went down the street to another local bar to see if it would work or not. Eventually, the men start asking other Japanese people for help. We come to the conclusion that the Elvis bar was at the building we were originally by, but it was up the stairs.
The people from our group that had split had rejoined us saying the bar down the street wasn’t really what we were looking for. So we all cram into the elevator, thank the men for their help, and go to the floor as instructed. We get there, and find nothing resembling an Elvis bar. We ask the lady greeting people on that floor, and she says we have to go down one level. Back to the elevator we go! Finally, we end up finding a bar….but it has low tables on the floor, carpets, hookahs, and we come to find out it’s Iranian. Not Elvis. We ask the people where the Elvis bar is. Turns out, the Elvis bar USED to be there.
We are tired at this point. William and I rationally decide that America is a melting pot of culture, so an Iranian bar is an American experience. We take off our shoes and gather around the table on the carpet on the floor. And as the Americans, we attempt to pay for the whole round of drinks. Of course, it’s just our luck that the bar we chose was about twice as expensive as the other places. The others in our party were generous and kind though, recognizing that and pitching in. In the end, I think all groups came out about even.
I would also like to point out how cool this last bar was. The servers were really friendly and seemed happy to have us. Steve and one of them bonded over being from Chicago. And we were the only ones in there which was kind of a nice way to end the night.
The others take the cab, but William and I decided it was close enough for us to walk back. Of course it felt like the walk took forever, we may have slightly regretted it, and we wandered through nightlife/club central where all these French men kept hustling us to come into their bars. It was definitely exciting. What is a William and AK vacation anyway without overestimating how close or far something is.
We got a good taste of local Japanese night life, we made new friends that I love following on Facebook, and this ended up being one of our favorite experiences of the whole trip. People are amazing, and connecting with people is was one of the best ways to spend your time.
In continuation with last week’s post, I am reviewing what activities we were involved in when we visited the last 2 islands of our Hawaii trip.
Molokai is a more secluded and less visited island. My recommendation is if you really want to get away from it all, to come here instead of Lanai. I discussed Lanai last week, but Molokai actually has beaches, lots of beauty, and lots of hikes available. It is also more affordable than Lanai.
Kauai is known as the garden island, and is my favorite one hands down! Just on one island, you go from beaches to jungle to desert canyons. We had the best food here, and we participated in the craziest activities here. This is how much time we delegated to each island:
July 8, 2014 – arrived in Molokai
July 9th – Molokai
July 10th – Transferred to Kauai by air
July 11th – Kauai
July 12th – Kauai
July 13th – Kauai
July 14th – Kauai
July 15th – Fly home
Molokai
Kalua’aha Church – Free
We found this church purely by accident. We were driving on the south side of the island to the east coast to see the Halawa Valley and stopped when we saw this. It is a tiny, one room church and is very cute and quaint. However, I would not specifically drive out all the way just to see the church. The only thing special about it really is its size.
Time we spent – 15 minutes
Halawa Valley – $60
First of all, just the drive over here from the center of the island is beautiful. We drove about as far as we could, but to actually go into the valley and get closer to Hīpuapua Falls within, you have to go on a hike. Since the hike involves crossing private land, you can legally only do this by signing on with a tour operator. I searched a couple of different companies offering the tour, and it really varies. One offers an option called a Cultural hike that doesn’t cost quite as much, but doesn’t take you all the way to the waterfall. When it’s combined with seeing the waterfall, it was $60. Another website only offered one option going to the waterfall for $75. Do your research and book in advance if you really are interested. Just what we saw from far away seemed very beautiful and I would not turn down the opportunity to hike there. Also, I have read though that the hike is considered an intermediate/advanced route. So keep that in mind!
Time we spent – 2 hours (including drive there, not including hike)
Pālāʻau State Park – Free
After Halawa Valley, we drove all the way back towards the center of the island and then headed north to get here. We ate dinner at the picnic tables provided, went on a very short hike, and found the famous phallic rock. Although the park is nice, and if I lived here I would probably spend time here, I don’t think it’s worth wasting your vacation time on unless you are in Molokai for at least a week or more. It is very different from the stereotypical Hawaii scenery. However, there is a lookout point either directly in the state park or right next to it to see Kalaupapa. Kalaupapa is a small community near the coast, surrounded by giant cliffs isolating them from the rest of the world. This was originally a leper’s colony, and you still cannot visit the community without a permit. If you don’t plan on actually visiting, it is cool to at least get a view.
Time we spent – 1 hour
Kalaupapa National Park – $60
As mentioned above, this area was originally established for people suffering from leprosy in the 1800’s. There is a lot of history and the journey to and from the colony, from what I understand, is quite stunning. However, since you must have a permit (which comes from someone residing in the colony), your only way in is to book through a tour or company. Hiking is the cheapest option at $60 a person. Keep in mind, you are literally hiking up and down a steep cliff. It is very strenuous. William and I did not do the hike on our trip, but William had done it previously as a teenager. He got really, really sick from the hike and almost didn’t make it through the whole journey. People can also book tours down on mules, or by flying, but the cost of course goes up from there. William and I sneaked past the first gate on the trail and walked until we reached the staircase leading down. At that point, there was a sign saying we would be fined if we crossed without a permit so we turned around. The only reason we didn’t do this hike is because I didn’t really plan anything on this trip in advance. Only 100 visitors a day are permitted access, so you definitely need to look into it. As I also mentioned above, you can at least look out on the colony in the state park if you don’t plan on going down.
Time we spent – 1 hour (not including hike)
Kapuaiwa Coconut Grove – Free
All we did was stop on the side of the road when we saw it, and walked around a bit. Very cool for a quick picture stop, but nothing to go your of your way for. Just lots and lots of trees like you would imagine it to be.
Time we spent – 15 minutes
Kepuhi Beach – Free
This beach is located on the west end of the island. We mainly went here for nostalgic purposes, since this is where William had spent a lot of time the last time he came to the island. He remembered it not being crowded, which we found to be true. In fact, even though it was July, we were some of the only people on the entire beach. There were some giant rock structures that were great for putting our stuff on, the sand was very soft, and it was very quiet. I found this beach very clean and relaxing.
Time we spent – 2 hours
Molokai Post Office (Post-a-Nut) – $18
We came here to mail a coconut home to my parents! They have coconut shells to pick from, as well as sharpies for decorating and coloring. The main reason it is so expensive is because coconuts require a lot more postage than paper. We had so much fun mailing our coconut, and our parents enjoyed opening the mailbox and finding it in there! Highly recommend, even if you do it from a different island. Note that, the price also differs based on the weight of the coconut shells you pick from so choose wisely.
Time we spent – 20 minutes
Kauai
Hilton Garden Inn Kauai Wailua Bay – Free
This is the hotel we stayed at (though when we were there, it was an Aston Resort). I include this because not only did it have its own beach, but it had a section blocked with a bunch of rocks, creating a calm pool. I really liked this because I was still straight up in the ocean, but didn’t have to worry about scary fish or big waves touching me. There was just a giant parking lot for the hotel guests, but I do not remember having a pass. I believe you could just park here, walk down to beach and enjoy the pool as well. However, now that it has changed ownership this may not be the case anymore.
Time we spent – 2 hours
Maniniholo Dry Cave – Free
For our full first day in Kauai, we were on our way driving north to hike a bit of the Na Pali Coast. On the way there, we stopped at this cave. It is just one giant room, big enough for you to walk upright throughout. It is also very, very wide. Right across the street is a beach so you could make a day of it in the area. Parking is a little difficult because it’s crowded, but free.
Time we spent – 15 minutes
Ke’e Beach – Free
This is basically where the main road going around Kauai ends on the north side. This beach is also right next to where the Kalalau Trail into Na Pali territory begins, and is located within Hāʻena State Park. It was mildly crowded, and we only really went in the ocean for a bit here after our hike to kind of wash off and refresh ourselves (I had gotten really sick on the hike). It was pretty, but I’m sure other beaches in Kauai are better.
Time we spent – 15 minutes
View of Ke’e Beach from the Kahalau Trail
Na Pali Coast – Free
If you come to Kauai, you have to see the Na Pali Coast in some way, shape, form or fashion – I don’t care how! Our first experience was the free way. We took the Kalalau Trail 2 miles in to reach Hanakapi’ai Beach. It’s definitely one of the most scenic hikes I’ve ever been on. You’re essentially walking up and down the dramatic cliff coastline to this secluded beach. The trail actually continues for a total of 11 miles into a valley. Several people take a few days to hike in, camp at the end for a bit and head back. The only thing is this a very strenuous hike. Lots of elevation changes even though it feels uphill both ways and it gets pretty muddy and slippery which is scary being on a cliff edge. Beauty is pain after all. William and I didn’t realize it would be like this and of course did the hike with only like 2 bottles of water on us. I also had been recovering from a parasite, and I think it took quite a toll on my body. I was fine going in, but on the way back I got pretty sick. It put me out of commission for the rest of the day but was WELL worth it. Also, Hanakapi’ai I think was one of William’s favorite beaches in Hawaii. It’s very secluded, quiet, and pretty small. There’s also (at least when we went) a large amount of water that kind of pools up on the beach, and actually gets pretty deep. So you can get in the actual ocean, or get in this calm body of water that goes up to about your hips. Now if you don’t hike the Na Pali coast, the only other way it is accessible is by boat or by air. We actually opted for both (we went a little crazy booking tours in Kauai). We did the helicopter ride a few days later out of the Lihue airport. It was my first time on a helicopter, so that was already exciting. But I can’t imagine picking a more beautiful location to see in the air. It took us all across the island – starting with the more desert like terrain of Waimea canyon, along the coast line of Na Pali, and then into the center of the island. At the center, there is an area known as the Weeping Wall. It is one of the wettest places on Earth, and this wall is covered in several waterfalls! I’ve never seen so many in one place and probably never will again. I’d also like to point out that the iconic Manawaiopuna Falls from Jurassic Park is only accessible from the air as well since it is on private land. If you see it in the helicopter, they even play the epic theme music for you. Finally, on our last day in Hawaii, we did a boat tour along the Na Pali Coast line. Though this was neat and I’m glad we did it, I probably would never do it again simply because of how exhausting it was. We did a raft tour, meaning we had to sit along the sides of the raft and hold onto a rope running along the side. We also had a rope stretched across the floor to put our feet under to help hold us in. It’s a miracle that I didn’t get seasick (I definitely had taken motion sickness medicine though in advance) because the waves were so big and intense. I would often go airborne, and there was no way you’d stay on the boat if you let go. This tour was about 4 hours long though, and it is difficult holding on for dear life for that long of a time. By the end of the tour, my hands and feet had rope burn, my back was killing me (not great for the flight home the next day) and I remember on the last 10 minutes of the ride back to shore, trying to decide if I really wanted to live or if letting go and dying would be more gratifying at this point. That being said though, it WAS very beautiful, amazing and unlike anything I’d ever done before. You can also book a trip by sea on a different kind of boat to make your experience a lot more enjoyable. It was really neat being able to go in and out of sea caves, waterfalls, and see the famous arch that Captain Jack Sparrow stands under in the Pirates of the Caribbean franchise.
Time we spent – 8 hours (4 by boat, 1 by air, 3 by foot)
This slideshow requires JavaScript.
Kapaa – Free
Kapaa has a lot of restaurants along the main stretch of road running through it. In fact, it tends to always have a bit more traffic slowing everyone down, and locals refer to it as the Kapaa Crawl. We decided to stop here for dinner one night. We just found a parking spot and walked until we found a restaurant that sounded good to us. Nothing to go out of your way for sightseeing wise, but a good place to find food!
Time we spent – 1 hour
Kilauea Lighthouse – $5
It’s a lighthouse on the edge of a cliff with a lot of beautiful scenery and natural surroundings. There’s a lot of wildlife around, particularly birds, to observe. If you have plenty of time on the island, I think it would be worth at least a short visit. William and I didn’t actually go into the lighthouse, and I don’t remember if that’s because it wasn’t open, or if tourists can’t go inside.
Time we spent – 30 minutes
Ching Young Village – Free
Situated in Hanalei, this is a little “Chinatown” that we found simply by driving by. We thought it looked cute so we decided to stop. Lots of food and shops in a tiny little area, although many of them not don’t have anything to do with China. I believe we ate some hot dogs here. Nothing to go out of your way for.
Time we spent – 30 minutes
Tree Tunnel – Free
When you are taking the main ring road around the island, you will have to turn onto this road to get to Poipu. It’s a just a street surrounded by trees, but it’s really lovely! I enjoyed it, and our tour guides on our zipline tour had mentioned it, which is how I found out it technically had a name. Really, all you can do is just drive through it.
Time we spent – 5 minute
Poipu – Free
Poipu is on the south side of the island, and has a very popular beach known as Poipu Beach Park. It also has a lot of restaurants and shops. I have a fond memory of getting ice cream in one of the shops and being amused that a chicken was strolling through (Chickens are EVERYWHERE. It’s like the Hawaiian version of squirrels – at least on Molokai and Kauai). We also mainly stopped in one of the shopping areas to look for a waterproof phone case for the above mentioned boat tour.
Time we spent – 2 hours
Spouting Horn – Free
This is a famous blowhole where you get to watch tons of water spit up into the air every few minutes or so. William and I watched it go off quite a few times. Even though we never saw it go as high as I see in some pictures online, I definitely think it’s cool to see. And it’s free parking too.
Time we spent – 30 minutes
Waimea Canyon – Free
Waimea Canyon is so beautiful – you must see it if you go to Kauai! It is free since it is located within a state park. William and I drove to several different look out points for good pictures, and even did a little hiking. I do not remember the particular trail we went down, but I remember not having information on how long the hike was. We kept going for probably 45 minutes, but since we didn’t know how much longer it was or where it was going, we decided to turn around. Despite being in the canyon area, the trail was surrounded by greenery and was a relatively easy trek. Waimea Canyon is known as the Grand Canyon of the Pacific, and the name is well deserved.
Time we spent – 4 hours
Harbor Mall in Lihue – Free
There is nothing very special about this place at all, in fact it seemed pretty dead. The only reason we came here is because our guides on the zipline tour (who seemed to LOVE food) had recommended us a restaurant here called The Feral Pig. It was good, although I admit I am not much of a burger person in the first place. William however, says it’s the best burger he has ever had. He always talks about coming back here. We had actually heard it shut down, but just to relocate so now there’s really no point coming to Harbor Mall at all.
Time we spent – 1 hour
Kipu Ranch – $118
The tour has changed since we last went, but the zipline tour we went on offered 8 ziplines, including the longest one in Hawaii, and some time at a water lagoon surrounded by jungle with a high platform to jump off of as well as a little zipline into the water. Even though William is scared of heights, he had the time of his life and always is talking about wanting to do this again. The ziplines were all located on Kipu Ranch, which is private land. It has been featured in many different films, most notably Jurassic Park and Pirates of the Caribbean. It was really scenic, really fun, and for movie buffs, probably the most fun way to get access to the grounds. I know there are also specific driving tours through Kipu Ranch as well though. Since I have not ziplined anywhere else except little ziplines in Texas, I don’t have much to compare it to.
Time we spent – 5 hours
Wailua Falls – Free
We did not get up and close to this waterfall. We simply drove to the closest scenic overlook. It’s very pretty, but probably only worth your time if you try to get closer. Be aware of flooding. Even though we were pretty far away, it looked like the roads and trails around us were covered in water.
Time we spent – 15 minutes
Fern Grotto – $25
This beautiful grotto is only accessible by boat, but is only a short boat ride up the river. We bought tickets on site. Many boats go every day and they seat a lot of people so you’ll probably always be fine as a walk on (though it is cheaper to buy tickets in advance). While you cruise down the beautiful river on the boat, they have dancers perform with items rooted deep in Hawaiian tradition. Once there, you actually get to walk off the boat and head to the grotto. They briefly talk about the history and science of the area, and then have a group perform a traditional love song in Hawaiian on the platform in front of it. Many couples get married in front of the grotto so it is considered a romantic place. I’d say overall, even if it’s a bit touristy, that this is worth the time and money.
Time we spent – 1 ½ hours
As mentioned earlier, Kauai was my favorite island. If you were to choose any of the islands, I recommend this one the most. I think William would agree as well. If I ever got the chance to go back, I think I would simply want to:
Check out more beaches and restaurants, and relax.
Spend more time hiking in Waimea Canyon
I’d like to spend more time on the Na Pali coast, but with it either being expensive or tiring to reach, I don’t know if I would do it a 2nd time. I probably would book a different kind of boat tour if I had the money to.
If I went back to Molokai, I’d like to:
Actually participate in the Halawa Valley hike with a guide
Ride a mule down to Kalaupapa and tour the colony
That’s a wrap on our trip to Hawaii. I’m sure we will be back someday since William asks to return on a weekly basis.
Hawaii is a big place. William and I went on a 2 week trip covering 4 islands. Therefore, I decided to break this trip into two recap posts – covering 2 islands each instead of one giant Hawaii post.
My sister (once again) had requested a Hawaii post for her friend who is planning a trip there. I hope this helps, and please feel free to comment or contact me with any questions!
William and I flew in July 1st, 2014. We arrived in Maui in Kahului on the east side of the island. I have our basic schedule below to see how much time we delegated for each island.
July 1st – arrived in Kahului, Maui
July 2nd – transferred to west side of island in Lahaina, Maui
July 3rd – Maui
July 4th – Maui
July 5th – Maui
July 6th – Transferred to Lanai
July 7th – Lanai
July 8th – transferred back to Maui to Kahului for flight to Molokai
As you can see, I gave Maui a lot more time. It is a much bigger, more populated island with a lot more to see and do. In fact, I did not care for Lanai that much in general and would recommend skipping it unless you REALLY want to get away from it all.
Maui
Kanaha Beach Park – Ka’a Point, Kitebeach – Free
We had flown all the way from Dallas to Kahului and had a bit of free time left in the evening, so I was just dying to see a beach. This was closest. We didn’t actually relax or swim there, but just walked around, felt the sand, and people watched a bit. The beach was quiet and it is apparently is a place where people like to fly kites and kiteboard. They were everywhere, and I can confirm it was very windy. I imagine based on the nickname and the location of the Kiteboarding school that this area is very windy a lot. I probably would not come here unless I had the intent to participate in an activity involving that much wind. Other beaches are more relaxed and just as beautiful.
Time we spent – 30 minutes
Queen Ka’ahumanu Center – Free
This is just a fun little shopping mall. It’s nothing special. We still had a bit more time in the evening, but didn’t want to go outside of Kahului for the night PLUS we were hungry so that’s how we stumbled in here. It did have a Starbucks.
Time we spent – 1 hour
Hana Highway – Free
I highly recommend making sure you have a rental car just so you can make this drive (plus public transportation in Maui is not great). It is a beautiful stretch of road, mostly along the coast and through greenery galore. It does change elevation a lot, is usually one lane, and has a lot of twists and turns. Even with my motion sickness medicine, we had to stop a few times because I couldn’t take it (and sometimes just to take photos). BUT IT WAS STILL WORTH IT. There are also really cute, remote little shops and restaurants along the way you can stop at. At this point, our plan was just to try and drive around Maui in a clockwise direction until it got late. We drove the entirety of the Hana Highway starting in Kahului, and ending in Haleakala National Park. It took about 3 hours of driving, not including any of our stops.
Time we spent – 4 hours
Waianapanapa State Park – Free
I mainly was interested in visiting the beaches here because I read they had black sand! I thought it was really cool to see. The beach was small. There were really cool rock formations right along the water that the waves would splash against. They were fun to climb and explore around. There were also underwater caves here. We weren’t planning on swimming so just saw the entrance to a cave with a group getting ready to swim in it. If you have time, I think it’d be worth your time. I know most people stay on the northwest side of the island though, so it is a bit far from there.
Time we spent – 1 hour
Haleakala National Park – $25
Haleakala has two different sections to the park: the coastal area and the summit area. On this particular day with the Hana Highway, we did the coastal part. We first viewed the Seven Sacred Pools at Ohe’o which is a really short, easy walk for a beautiful view. It’s all of this water flowing into the ocean, except it certain areas it kind of pools up (hence the name). Then we decided to do a 4 mile round trip hike to see the Waimoku Falls. It was a scenic, easy, flat walk. It is well worth it to see the waterfall, and it is one of the biggest waterfalls I have ever seen up close. There was a sign telling us we couldn’t go past that point, but everybody else was straight up under the falls and swimming around so we walked over too. I have mixed feelings about this decision: it was so beautiful and amazing to actually stand under it, but I also now realize the negative impact tourists have on nature. So, if you go, at least consider the consequences of crossing the sign unlike I did. I’d also like to add that even though driving here on the west side of the island is not part of the park, it was very interesting terrain and I’d recommend coming to the park on the Hana Highway and leaving in the opposite direction, or vice versa, like we did.
William is standing at the bottom
We came back a couple of days later to do the summit side (included in the 7 day pass admission, which is only per car by the way), which is also definitely worth your time. The drive up has a lot of switchbacks and can be a bit nauseating if you have motion sickness like me. It is also really, really, really high up. Above the clouds. So keep in mind the elevation change, as well as how hot and close to the sun you are. I got one of the worst sunburns EVER here. I also got proposed to on a hiking trail near the top! Where we stopped our car to start a hike, the hiking trail was pretty long so we only went about 30 minutes in, which was enough to see into the crater. We also drove to the visitor center at the very top for the ultimate high views directly inside. The colors are stunning, the terrain is fascinating and it’s crazy to me how much the summit area drastically changes from the coastal area in the same park.
Time we spent – 3 hours (coastal), 3 hours (summit)
This slideshow requires JavaScript.
Makena State Park – Free
I had read that this was a highly rated beach which is the sole reason we chose it for our “typical, lay on a beach in Hawaii” experience. If you know me though, I run 100 miles per hour and have a hard time relaxing. So we weren’t here all day, but I did read a bit, lay down, walk along the coast, and get in the water. It was a very beautiful beach, and a lot less touristy than all of the beaches in the north on the resort strip. Makena was not very crowded at all and pretty quiet.
Time we spent – 2 hours
The Shops at Wailea – Free
This was a nice, outdoor shopping center not too far away from the Makena Beach. It is nothing special or out of the ordinary, although I would like to point out that this is where we discovered Ali’I Nui and signed up for a snorkel tour. I’d probably skip this unless you love shopping everywhere.
Time we spent – 30 minutes
Whaler’s Village – Free
Once again, lots of outdoor shopping! This area is larger though and surrounded by giant resorts right next to the beach. The whole area in and around Whaler’s Village is worth strolling through. If you stay at any of the main resorts in Kaanapali, you will already be in this area. I can definitely see how some tourists just come to a Hawaiian resort and spend the entire time there. There are plenty of restaurants, variety, and so much beach!
Time we spent – 2 hours
4th of July Celebration in Lahaina – Free
This just a typical celebration in downtown Lahaina, which is a very cute part of the town. There are lots of restaurants, lots of people everywhere, and performers. We spent an hour just walking around and exploring, listened to an Elvis impersonator and then found a good viewing spot for fireworks over the ocean while watching the sunset since Lahaina is on the west side of the island. It was one of the most magnificent sunsets ever, the fireworks were great, and it was quite a way to celebrate our proposal. I recommend at least showing up in time for the sunset and fireworks.
Time we spent – 2 hours
Ali’I Nui catamaran snorkel tour to Molokini and Turtle Town – $189
This was quite a splurge for us. Since I didn’t have time to really plan this trip the way I usually do, we just signed up in a shopping center for this tour about 2 days out. I bet you could get better deals in advance, as well as compare companies. You could also get a tour that offers less to the customers but gets you to the same places. This was a baller, nice ship complete with all the drinks and food we could want. It also included transportation to Maalaea by bus to the boat. We also did the deluxe, longer sail since we wanted to do both locations. I had never snorkeled before, so I don’t have a lot to compare it to. The first stop, Molokini, was a beautiful area and there were lots of colorful schools of fish in it. I didn’t see anything scary, and the water was very clear. At our 2nd stop, Turtle Town, we did in fact see and swim right next to sea turtles. Also lots of fish here. I’m glad we did both stops, but if you are on a budget, I’d recommend choosing the Turtle Town area. But maybe that’s just because I love turtles.
Time we spent – 8 hours including all driving and transferring
Molokini
Maui Ocean Center – $29.95
We actually did this after our time in Lanai. We took a ferry to Lanai from Maui and actually just parked our rental car for free in Lahaina (it was cheaper and more convenient). So when we were ready for our 3rd island, Molokai, the best option was to come back to Maui and fly over. So we had one more day and night here. We stopped here at the Maui Ocean Center just because it was on our drive back to Kahului, where we were staying next to the airport again. It was a nice aquarium, and we enjoyed our time there. I don’t think it’s one of the biggest must-see’s in Hawaii though.
Time we spent – 2 hours
Lanai
Hulopoe Beach – Free
This is the only big beach in Lanai, and even then, there was hardly anyone on it. The Four Seasons resort is right next to it. If you stay on this island (at least when we went), your only lodging choices were $500 a night at the Four Seasons, or staying inland at the Hotel Lanai for much less. Guess which we picked? Even though we weren’t a Four Seasons resort guest, we were able to park in the parking lot and walk right through the hotel onto the beach with no problems. We came pretty late and watched the sunset there. Definitely a nice resort and beach if you are rich and literally want to get away from it all. Otherwise, it’s not special enough to make the whole ferry or flight over for.
Time we spent – 1 ½ hours
Lanai City Center – Free
This is almost the entirety of Lanai City, and it’s basically just a square of shops, restaurants, etc. situated around a little park. Nothing special, but if you are in Lanai anyway, it is good to walk around, see what you can get in the town, and maybe find some food to eat. It has a very local feel.
Time we spent – 30 minutes
Shipwreck Beach – Free
This is pretty remote, and you can only get here if you have a rental with 4 wheel drive. Paved roads disappear and it gets bumpy and tight. I actually expected there to be something resembling a beach, but really it was just a drive to see an abandoned ship out on the water. You can’t even get that close to it. I wouldn’t bother.
Time we spent – 1 hour (including drive)
Garden of the Gods – Free
This area is just a bunch of rocks. I was pretty disappointed. They are very red rocks, and it definitely does not seem like something you would ever see in Hawaii. However, just go to the Garden of the Gods in Colorado Springs and you’ll be a lot happier. Also, driving the vehicle on the roads in this area worried me.
Time we spent – 1 hour (including drive)
As you can tell, I was not that impressed with Lanai. Due to its remoteness too, everything is SO expensive! The food is expensive. Rental cars are expensive, and the gas for them is insane. I wasn’t impressed with Lanai City, so really I didn’t care about anything on the island. If I ever came back, all I would do is:
Stay at the Four Seasons Resort for a very short period of time using points and relax without a car.
If I went back to Maui, I’d be interested in:
Staying in Kaanapali or Kapalua in the Northwest
Revisiting the Hana Highway and Haleakala National Park
I’m biased though. Since William proposed to me at Haleakala, it and all of Maui will always be pretty special for us.
Recently, I have been asked to share what I do in order to find cheap flights by my sister, Ashley. She wants to visit me next summer while I am in Bangkok for school!
Flexible Travel
First of all, the best way to get great deals is to be super flexible. Like not caring when OR where you go. When you have this flexibility, you can get SUCH a great deal. Sometimes the planner in me cries because I can’t take advantage of those spur of the moment $300 airfare to Rome offers.
If this applies to you however, I’ve got a couple of GREAT resources.
This website finds some of the best deals on the internet, including mistake fares! You can pick what US city you want to look at specifically (I chose Dallas) and then see the routes, dates, and prices available for some really cheap tickets. These deals go crazy fast though. Even though older ones will stay posted on the website, I usually don’t bother looking farther back than 2 days.
When I looked just now, there are a few decent deals flying to India, Indonesia, and Rwanda for about $800 round trip from Dallas. However, a couple of days ago I could have taken advantage of $474 round trip fare to Barcelona.
Once you find a deal you are interested in, you can look at the dates available and other specifications, as well as exactly how to find that flight with that price to book.
Speaking of being flexible, another thing to keep in mind is maybe flying in CLOSE to where you want to go, instead of exactly to that destination. If you weren’t necessarily interested in going to Spain, but you did want to go to Europe, it still might be advantageous for you to consider the above mentioned flight offer, and then take a train to where you wanted to go.
To get to this website you have to directly type the URL in. It will not appear for you by just googling it. Once there, you can use this tool to not only search flight routes to specific cities, but to regions! If you want to go anywhere in the US, you can just type in “From: Dallas, To: United States.” It will then bring the major cities up, and rank them based on the lowest fare options.
When I looked up Dallas to the US just now, Denver came up as my cheapest option within the next 3-5 days for $90 round trip. However, each city also provides a bar graph showing the prices on a day-by-day basis. You can look for a large dip in price easily this way! When you click on the Best Price button, it will bring you to a separate page giving you the details of the flight (airlines, times, dates, etc.).
Finally, if you click the date listed at the top (where it says August 12th for the outbound option), it will bring up a calendar view, with the lowest prices each day listed. I used this feature one time searching fares to Orlando to find a time my husband and I could afford to fly down for a weekend at Disney.
Keep in mind, you could also use this to search the cheapest flights into Europe too!
If you are like me though, I like to plan my trips almost as far out in advanced as possible. Mainly because I get too excited to wait. My husband and I also work year round. In order to take advantage of our time off, I like to fly out late on a Friday or early Saturday, and I like to come back late on Saturday or Sunday to maximize my time away. This leaves me with a lot less flexibility. A lot of people have to travel during specific breaks or holidays as well, and are probably in the same boat. The good news is this online tool can be helpful in that case too! You can search prices quite a few months out in advance.
ITA Matrix
Now when I am actually looking for a flight with a pretty specific destination and dates, I first go to the ITA Google Matrix. This searches several different airlines prices directly from the airlines, and has a bunch of cool features when comparing flights. For my sister’s example, airfare for visiting me next June/July is not available yet, so I took a look in May. I used the dates May 1st – May 8th, DFW – BKK.
The cheapest flight was for $981.56 round trip. However, it is a mix of airlines. Eva Air and Alaska Air are NOT partners, so they would have to be booked on separate tickets. This can be dangerous, because if you’re Alaska flight gets delayed and you miss the Eva flight, Eva Air won’t care since it is not their fault or responsibility. If it was an extremely long layover, it might be worth it. I also have occasionally booked with one airline on the way to a destination, and used a different one on the way back.
With only a 2 hour 40 minute layover in Seattle, I would not risk this option.
When I go back and look at my search results in the matrix, the cheapest flight that is all one airline (or airline partners) is an all Emirates choice for $1,030.96.
The thing about the matrix is that it doesn’t sell you the tickets, it just tells you how to find them. However, I love that it doesn’t have ads and pop ups and comparing tools slowing down your computer. With this above flight, I went through the Emirates website and selected the same flights. Sure enough, as you can see, it was the same price.
The other thing about the ITA Matrix is that not all airlines are included on it. So if all you care about is literally the cheapest deal, you will have to do some more searching. Before I delve into that more though, I want to cover the other reasons I love the ITA Matrix.
If you look at the first ITA screen shot, you can see at the top it listed all the different airlines separately with prices underneath. If you only like to fly certain airlines, like American or United, you can instantly see the cheapest prices they are offering there and click to see the routes more in depth. You can also already separate the prices by 1 or 2 stops.
On the top right corner, you see an option on the search results page that says “Time bars.” Click it, and you’ll get something that looks like this. This is a really great visual representation if you care about the duration of your flight journey, or about your layovers. My favorite thing is to look for the big layover chunks and see if maybe I can sight-see a little somewhere. In the above example, you can see the gray DEL bars in the middle are really long. This is almost a 22 hour layover in Delhi! It’s way too expensive in this case to be worth it, but if it was only a few dollars more…..why not?!
Back on the first page where you type in your trip information, there is an option to look at exact dates or search the calendar of lowest fares. If you select calendar of lowest fares, you can look at up to 2 months at a time with the lowest price for each day listed. This is similar to the Google Flights Explore, but since these dates are too far out for the Flights Explore, I can only look at the calendar view here. By searching through May and April, I see I have about 3 days where I could fly out for $901 round trip.
Continuing the Search
As I said earlier, not all airlines are included in the matrix. At this point, I used to just search every single possible flight search engine possible for hours, clicking pop up after pop up. But I have found that most of them only differ based on a few dollars, and I usually end up booking those flights through Kayak. In this example, I used the same dates and places and found the cheapest option to be through Kayak. It was still helpful that I checked the matrix first because I knew what price I was trying to “beat.” I clicked all of the pop ups, and other popular sites such as Priceline, Expedia, Travelocity, etc. Everything varied between $860 and $900 for the best deals, but on Kayak, it offered me one for $854. All of the flights were on China Airlines flights, which are not in the ITA matrix.
One last thing I usually do is to always check the actual airline’s website. Since the best deal I found was on a third party site, I want to check and see if I can get it cheaper directly from China Airlines. When I checked on their website, it gave me a total of $900.
So in this case, the best deal I can find on 7/5/2017 for a Dallas to Bangkok trip May 1st through May 8th is officially $854 total round trip.
Other Tidbits
If you have some time before you need to book a flight, it would be a good idea to sign up for some price alerts, such as on Airfare Watchdog or through the ITA matrix. These websites email you when they notice a price drop so you can watch it for a couple of months.
Keep in mind that airfare is usually cheapest to book on Tuesdays and Wednesdays. Also, flights that fly on Tuesdays, Wednesdays, or Saturdays usually have the best fares.
There is a very “exact” science to when the best time to book a flight is, depending on the destination you are traveling to. Refer to the chart on Cheap Air here to get a good idea based on region.
Seasons matter. Summer and Christmas time are expensive. My favorite time to travel is April because it’s before most of the tourists start heading out, but the weather has warmed up enough to be enjoyable as well.
Some credit cards that offer miles would still benefit you by searching for the lowest fare. Cards such as the Capital One Venture Rewards and Barclays World Arrival Plus earn you miles directly through them. You have to actually purchase a travel coded item, such as a flight on that credit card, and then redeem the points towards that specific purchase. For example, my sister could get the Capital One card mentioned above and earn 50,000 bonus points. When she buys the flight on Kayak for $854, she then will apply 50,000 points towards that purchase, taking $500 off. She then is only paying for $354 round trip for the flight.
If you are looking at some of the same airfare search engines repeatedly, clear your cookies and browsing history. If they know you’ve been looking for a deal on their site before, they know you are clearly interested and sometimes raise the price.
This is just my method when looking for flights. To be honest, I have never actually outright purchased an overseas international flight in full. Since I like to save my miles for the bigger trips where my miles go farther, I usually save miles for that and buy all of my domestic travel plane tickets.
I’d lastly like to dedicate this post to my dear friend Rachel, who introduced me to the Google ITA matrix 2 years ago. She was the foundation of where all of this came from, and I probably wouldn’t be as obsessed with all of this travel strategy stuff if it weren’t for her. You’re the real MVP.
Similar to my Recap post on Edinburgh, I will be listing attractions in the area we visited in order (2013), along with my overall thoughts, cost (as of 2017), and about how much time we put aside for each one.
William and I only spent one night in Cardiff. We arrived earlier in the day by train, and spent the day exploring the capital. To be honest, I wasn’t that impressed with Cardiff and felt like that was plenty of time to see the main sights. From what I’ve read and heard though, getting outside of the big cities is the key to seeing some of the best of what Wales has to offer. The next day, we took a day trip to some nearby towns with castles and found this to be the case.
Central Cardiff – Free
This is an area between the central train station and the castle in the heart of Cardiff, with lots of shops and restaurants. Although nothing special, it was lively and I enjoyed strolling through the area. It’s a great spot for people watching. Even though William and I didn’t shop, we still spent quite a bit of time exploring.
Time we spent – 1 hour
St. John the Baptist Church – Free
This is the only medieval building other than Cardiff Castle in the Central Cardiff area. It’s tiny in comparison to the main cathedrals people are typically visiting in Europe (St. Paul’s Cathedral, St. Peter’s Basilica, Notre-Dame, etc.). We only walked by the outside since we were a bit “churched out” at this point, but if you are already in the area, you might as well stop by.
Time we spent – 5 minutes (allow more time if touring inside)
Cardiff Castle – 12.5BP
Another attraction that we unfortunately didn’t go inside to see. It was closed! Since it is located in the middle of the city, we easily were able to walk the entire perimeter. It seemed like a great, typical medieval castle that you picture in your head when you think of that time period. I really would love the opportunity to tour inside the castle grounds; I feel like I missed out a bit by not doing so. For an additional cost, you can also go on a tour that takes you to rooms not included with regular admission.
Time we spent – 1 hour (outside only, included walk through Bute Park)
Bute Park – Free
We stumbled upon this park by pure accident when we were trying to follow the perimeter of Cardiff Castle. It was so green and lovely. It has a river that runs through it, and when I went, it featured a giant dragon head! What more can a girl ask for? If we had more time in Cardiff (and if it was summer), a picnic here would be pleasant.
Time we spent – 30 minutes
Cardiff Bay – Free
As the name suggests, this is the area of town south along the water. There are several notable buildings/monuments as well as a pretty view of the sea. The Wales Millennium Centre is here, featuring giant words that are well illuminated in the night time. The Welsh inscription says “Creating Truth Like Glass From Inspiration’s Furnace,” and the English inscription’s wording is “In These Stones Horizons Sing.” The venue features a variety of artistic acts. We just found the building to be really neat! Right next to the Centre is Roald Dahl Plass, in honor of the author who was born in Cardiff (just learned this). At the time, I just thought it was a cool plaza with pretty lights! The poles around it light up different colors at night. Standing in the plaza and looking to the right of the Centre, you can see the Pierhead Building. It has a red color to it since the exterior is made from terracotta blocks. It actually reminds me a lot of the red church in West End of downtown Dallas, with just a bit more of a gothic twist. It is one of the most iconic landmarks of Cardiff. Just past on the same grounds is Senedd, which stands for the National Assembly building. It has a very cool, modern design in complete contrast to the Pierhead. After exploring this area, we continued west along the edge for about a minute to Mermaid Quay. Mermaid Quay is full of shops, restaurants and was the liveliest part of the bay by far. However, we were walking through this area REALLY late on a Sunday night so it was still pretty quiet. I believe most places were closed.
Time we spent – 1 hour (while everything was closed)
Roald Dahl Plass
Wales Millennium Centre
Castell Coch – 6.5BP
This castle is a lot smaller in comparison to most, but it was designed by a father for his little girl. It is in the small town of Tongwynlais, which is just a short bus ride outside of Cardiff, and about a 10 minute walk from the bus station. It is situated uphill in the forest on the outskirts of the town. Very cute, but unfortunately, we didn’t realize it was closed during winter time! Still glad we made the journey though. It was a neat feeling being completely alone in a forest with the castle – there were no guards, no security, no boundaries. I could just run up and knock on the door if I wanted to. We also discovered that there was a nearby trail going further into the woods. I don’t remember if there was a sign at all, or if it was in Welsh, but we had no idea where it went and decided to follow for a bit. The moss was so green, the ground was red in certain areas, and it was beyond foggy. It felt like some weird, enchanted forest. We really enjoyed our time here in the town.
Time we spent – 2 hours (not including inside of castle)
Castell Coch
Forest Trail
Caerphilly Castle– 7.95BP
Caerphilly castle is in the town of Caerphilly (no way), and is another short bus ride along the way from Tongwynlais. I loved this castle! It stands out clearly in the middle of the small town, has a moat, and is huge (2nd largest in UK)! Even though I like history, I’m definitely more of a visual person in museums and attractions. I like to just look at the buildings and items and if something really catches my attention, I may read more about it. This castle did not have very many signs or information, but it let you just run wild through the whole thing. You could go up the towers, walk along the walls, explore some of the rooms, and stroll across the grass. They didn’t add a bunch of furniture or decorations to make it look like “back in the day,” they just left most of it empty. It felt more authentic that way. Some parts of the castle were never repaired, some looked to be in perfect condition. I just loved the freedom I had to explore what I wanted.
Time we spent – 2 hours
Caerphilly Castle
Not too much decoration inside
Unfortunately, that was all the time we had in Wales. We had to take the bus back to Cardiff to get to the train station after Caerphilly. If I had the chance to go back to Cardiff, I’d be most interested in going back to a couple of places I’ve already seen to an extent. They are:
Cardiff Castle – actually visiting inside and doing the tour
Mermaid Quay at Cardiff Bay – visiting during the day time
Realistically though, if I go back to Wales, I’ll be spending my time in the north part of the country around Snowdonia National Park. It will probably require me transferring in or out of Cardiff at one point, so we will just have to see how much time is available! I definitely feel like the land of greenery and sheep has more to offer me.
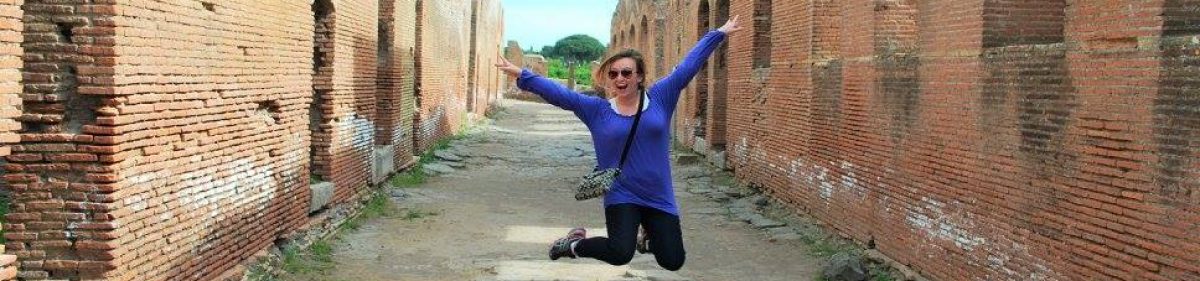
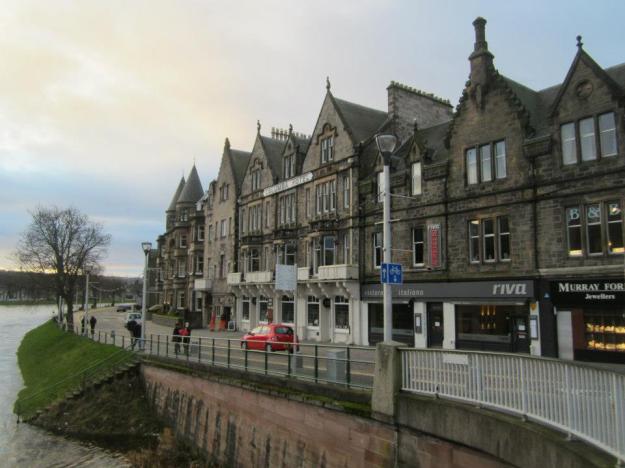


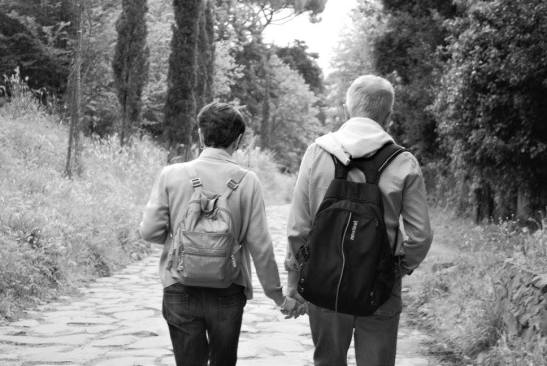

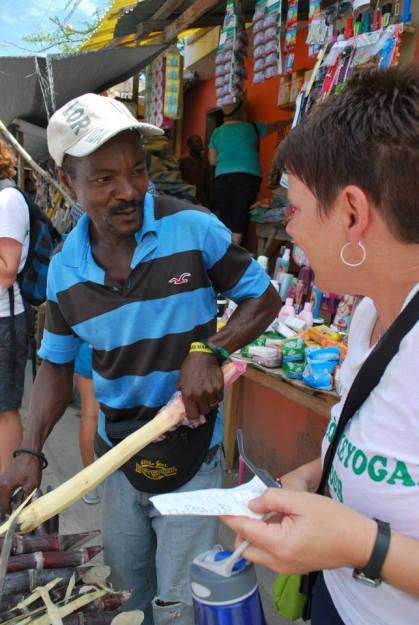

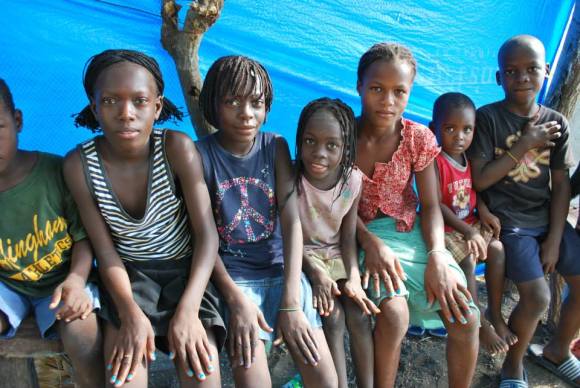

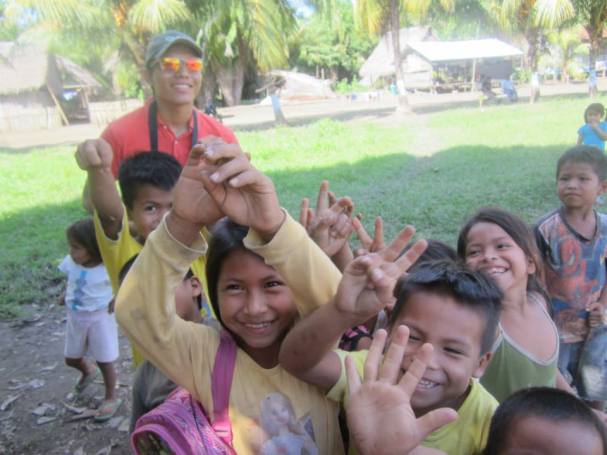
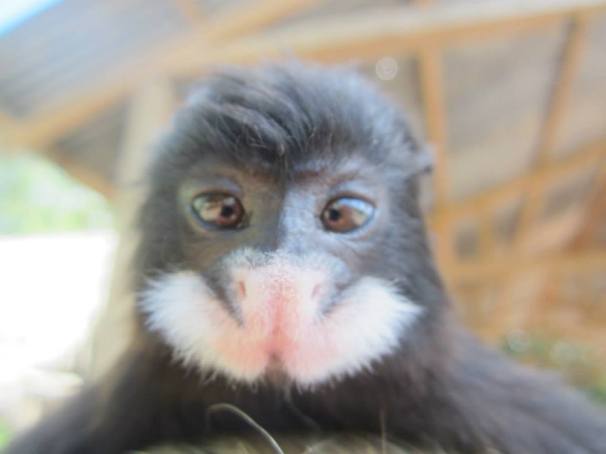
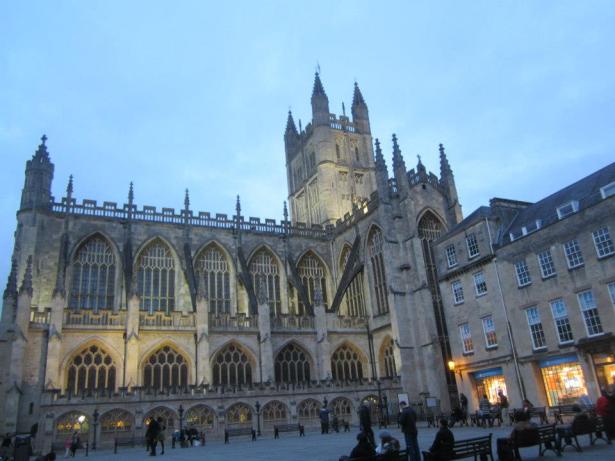


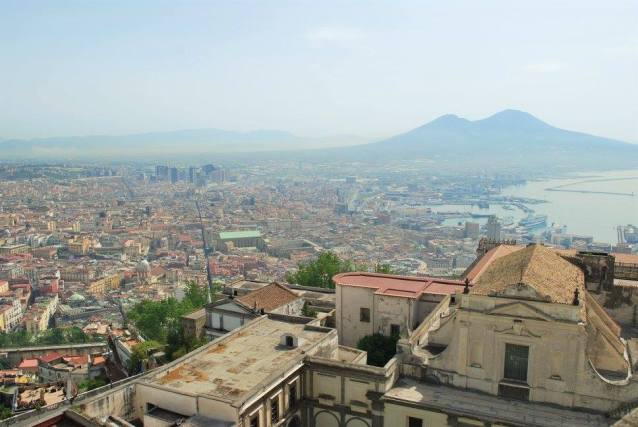


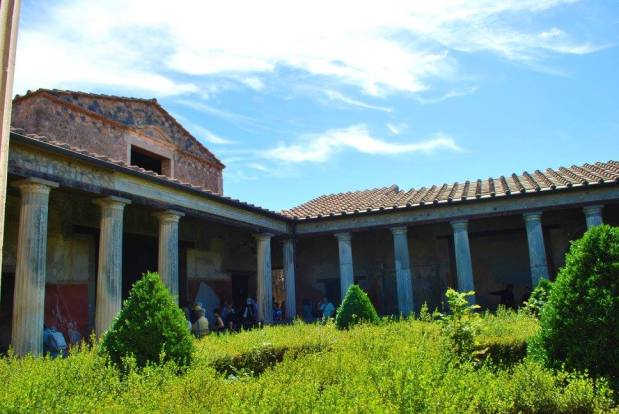
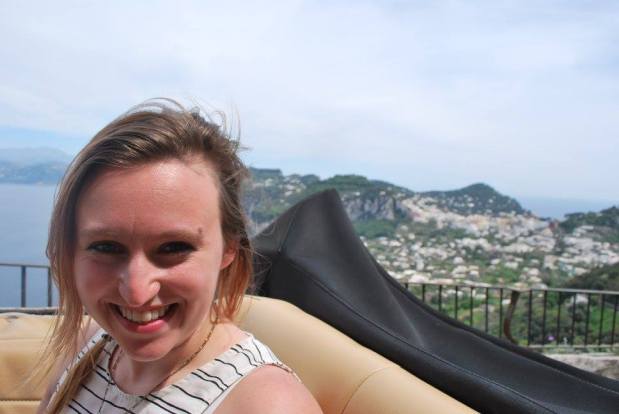
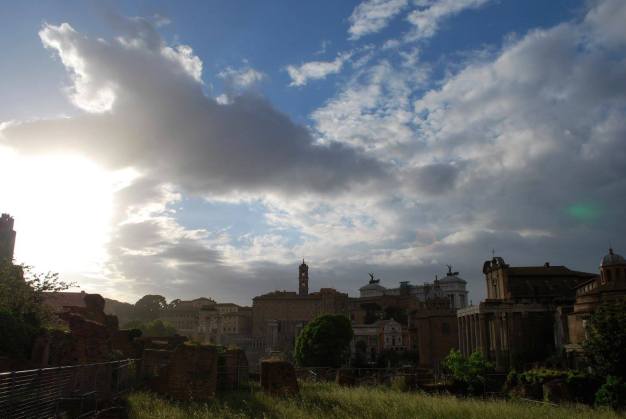
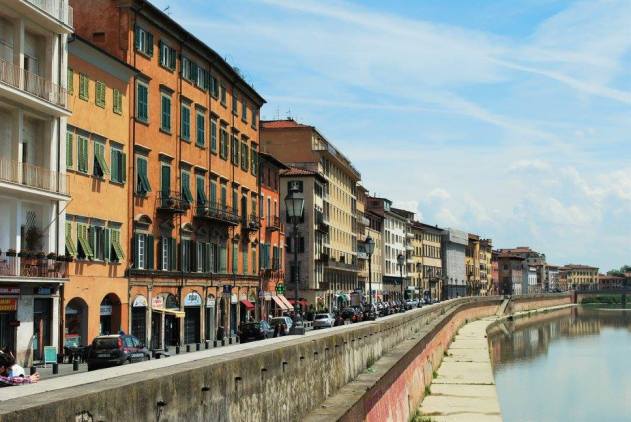
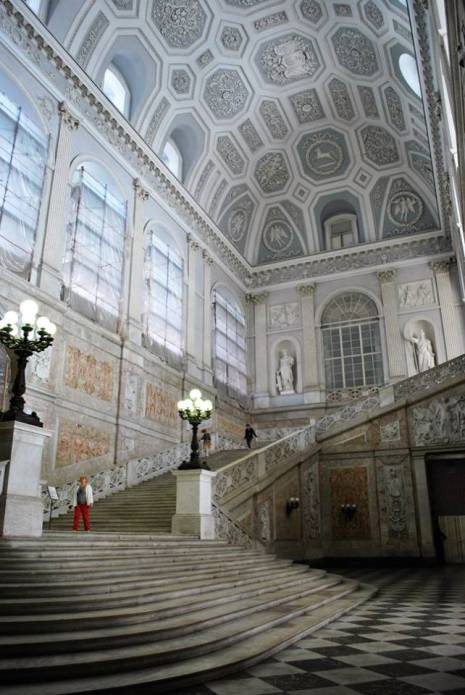
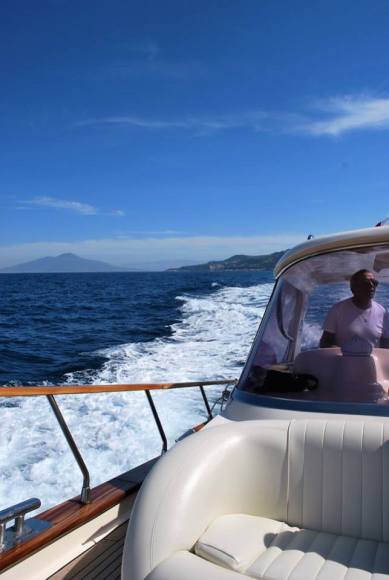
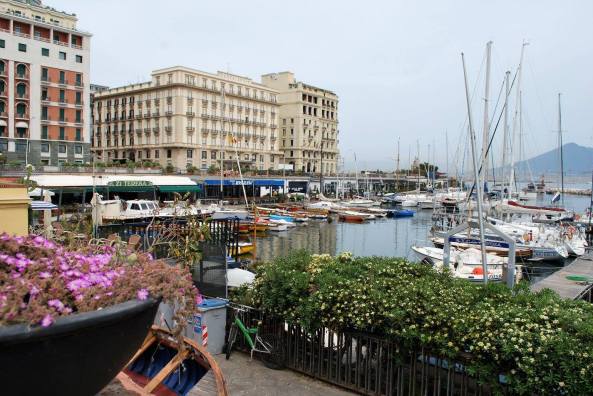


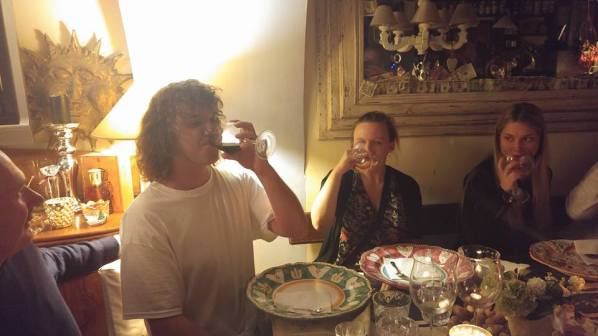

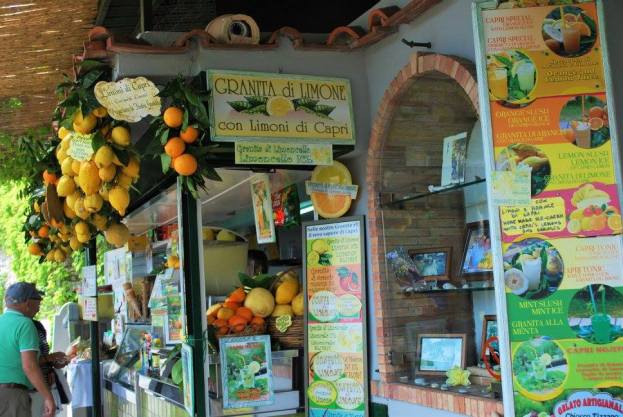
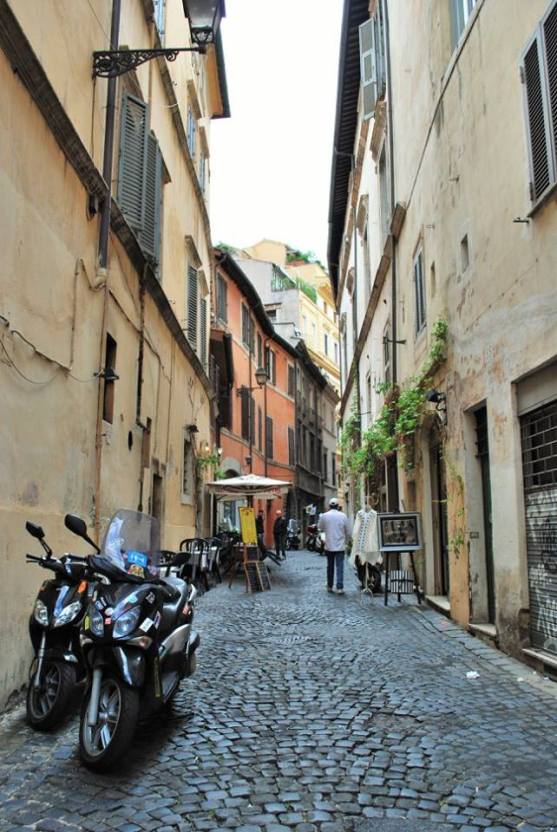
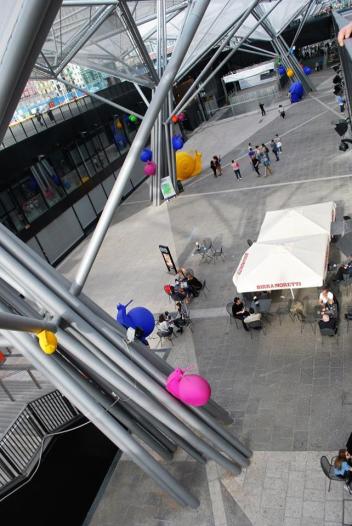
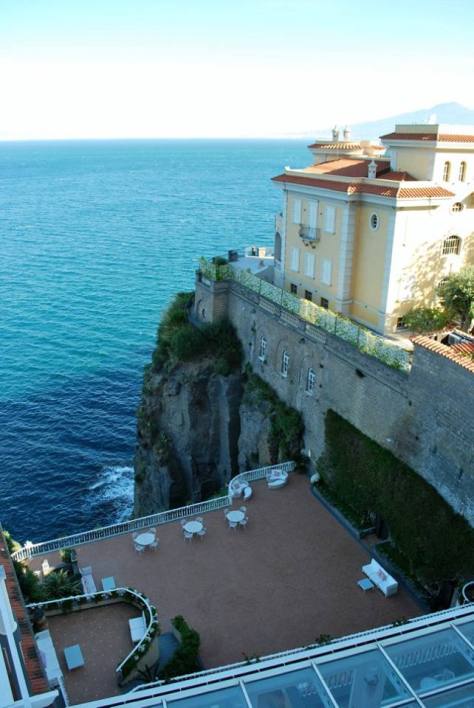
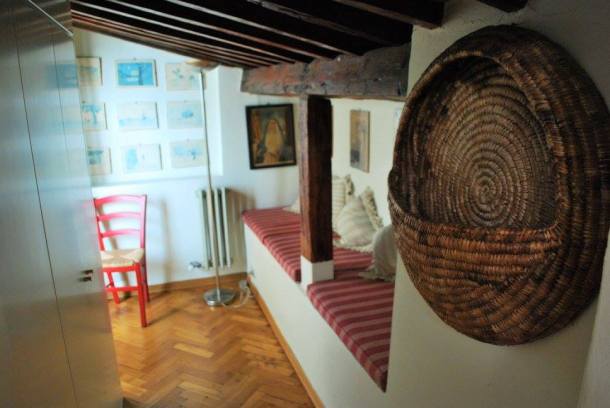
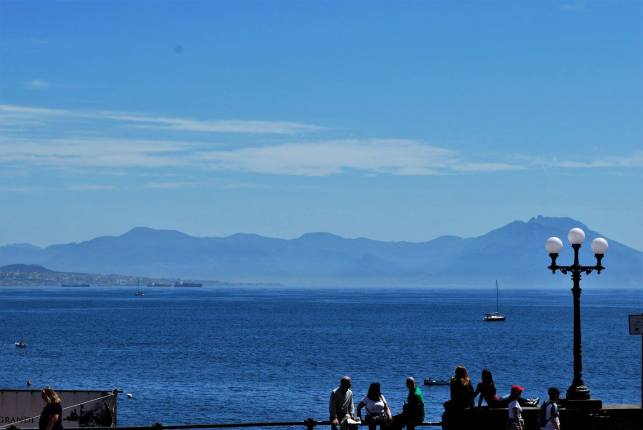
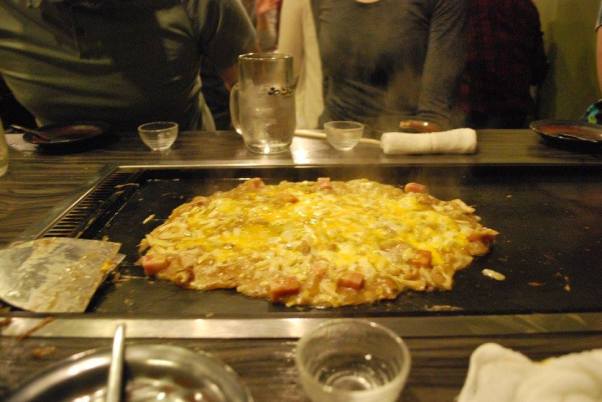
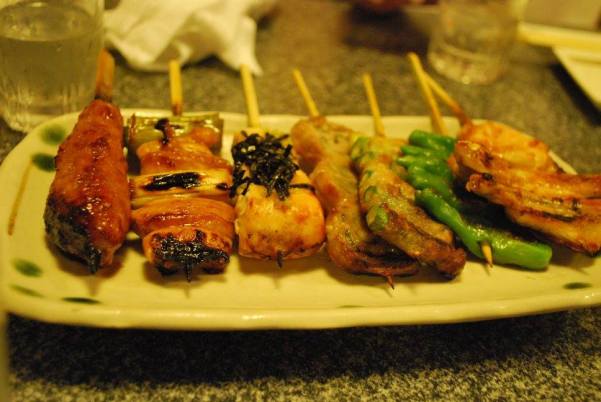
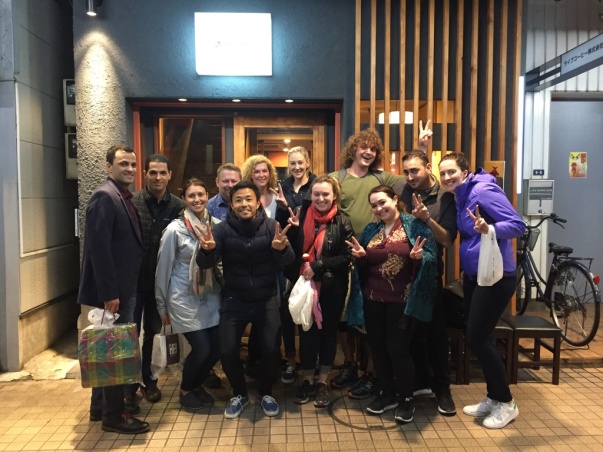
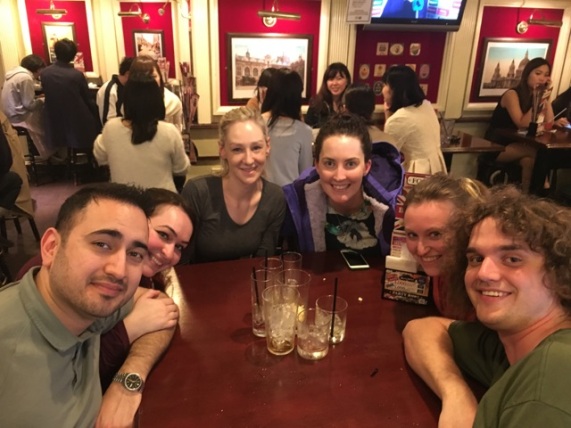
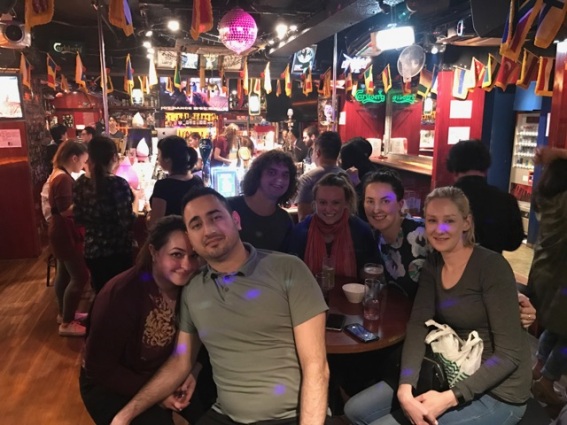
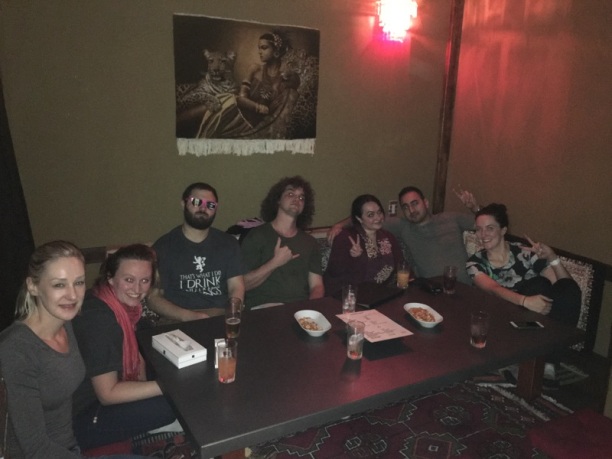
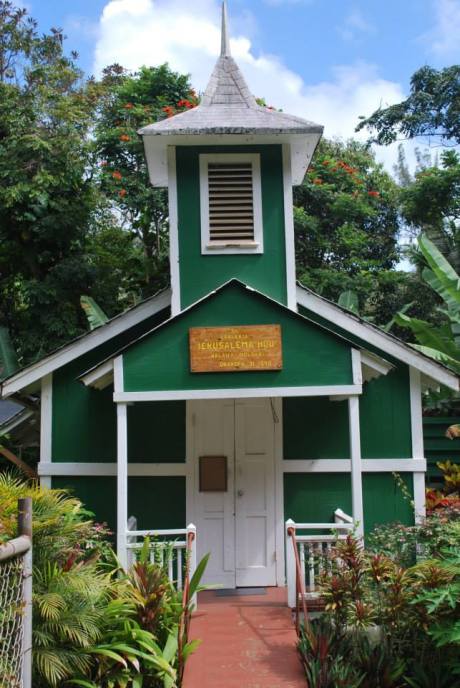
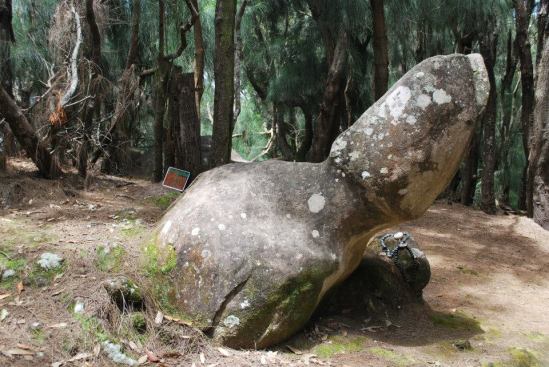
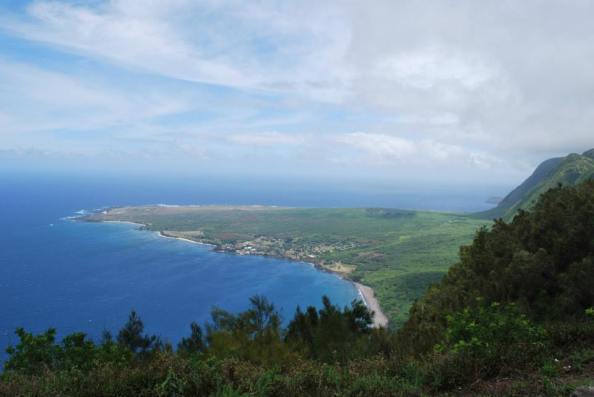
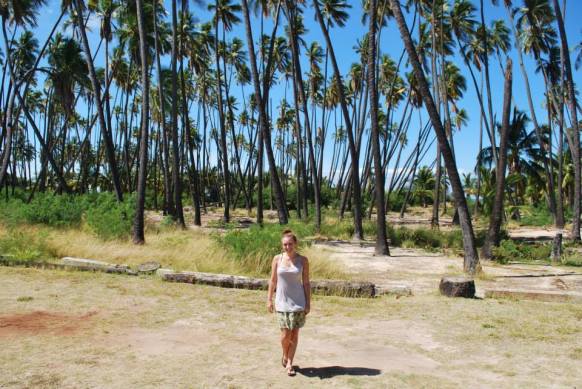
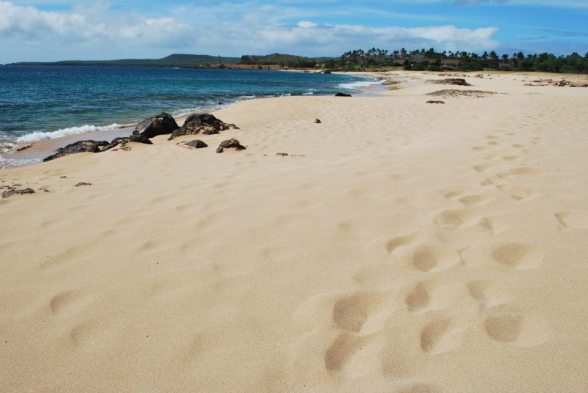
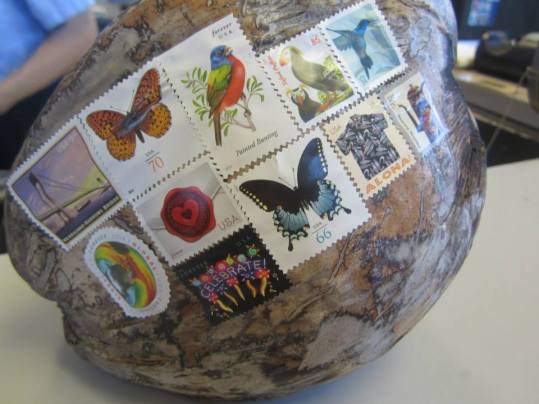
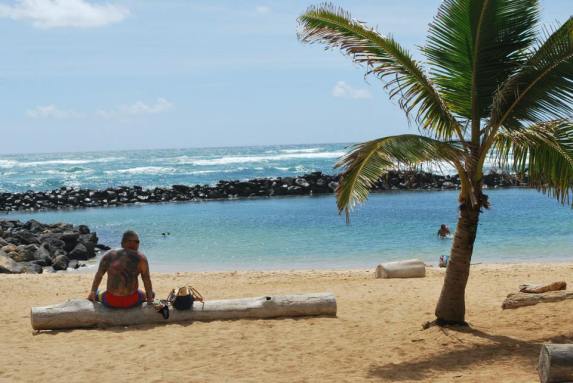
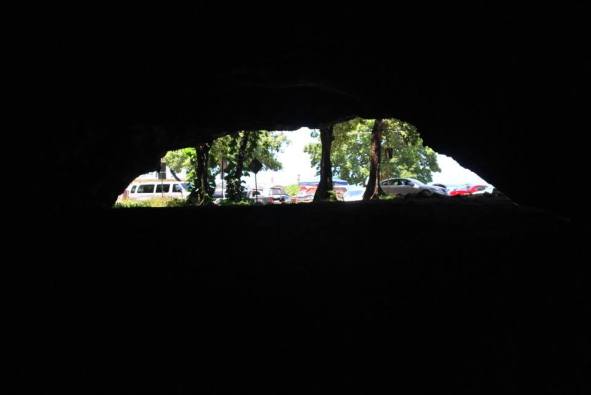
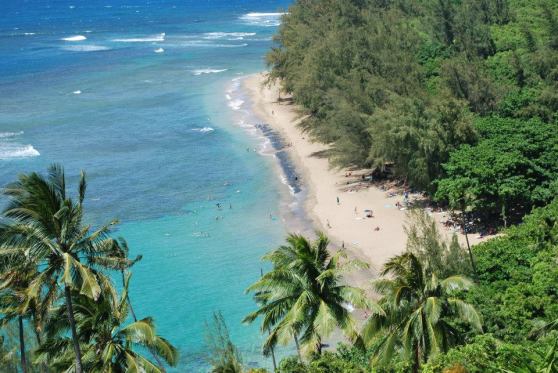


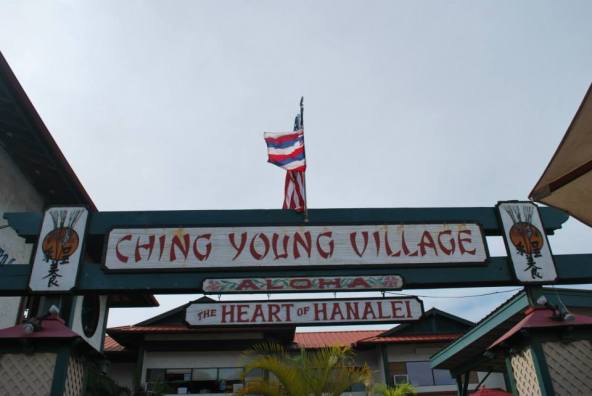
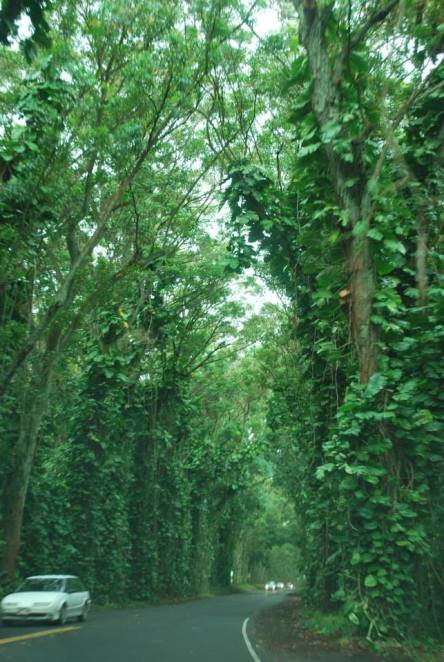
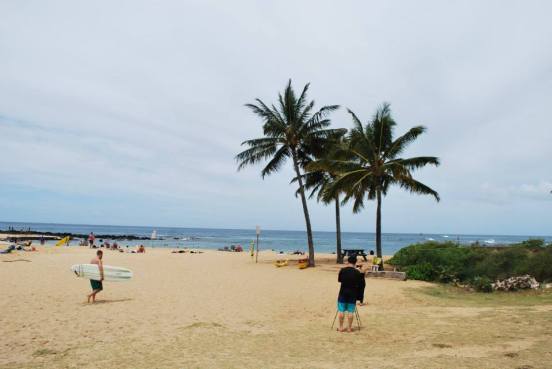
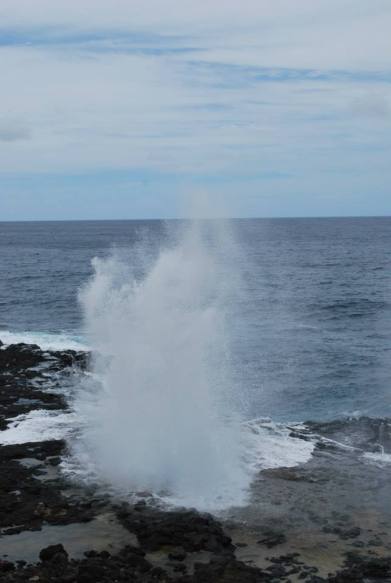


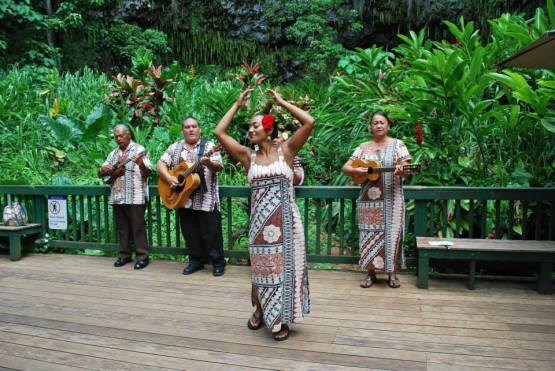
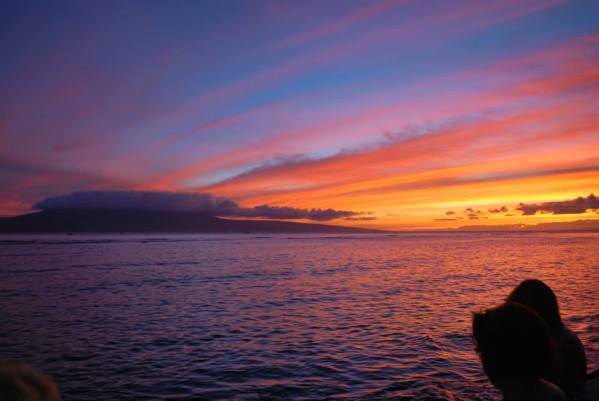
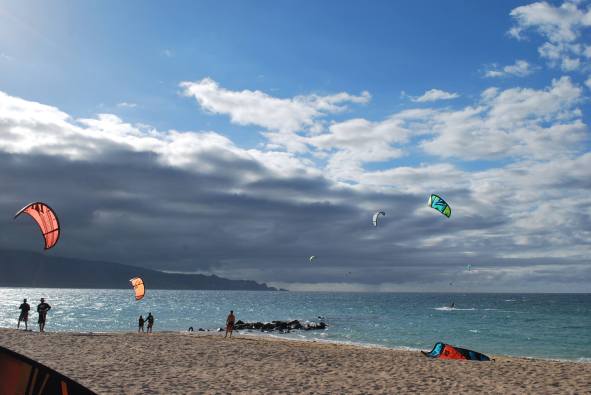


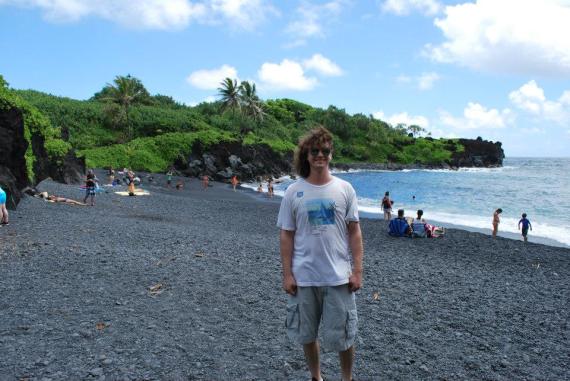


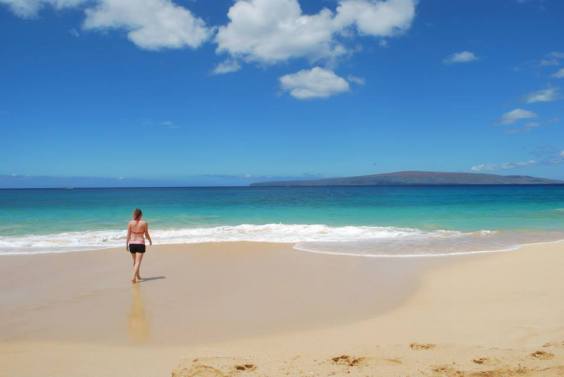
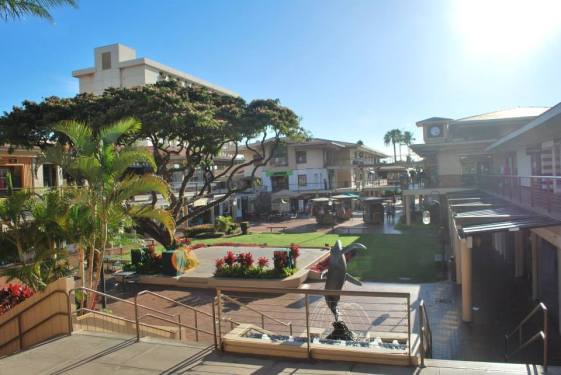


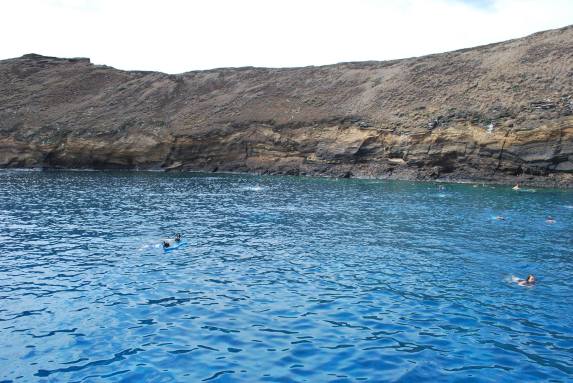
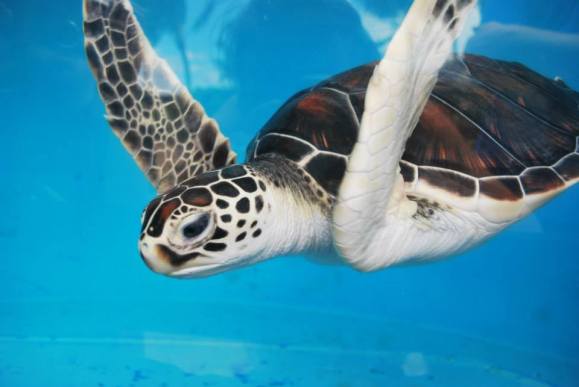
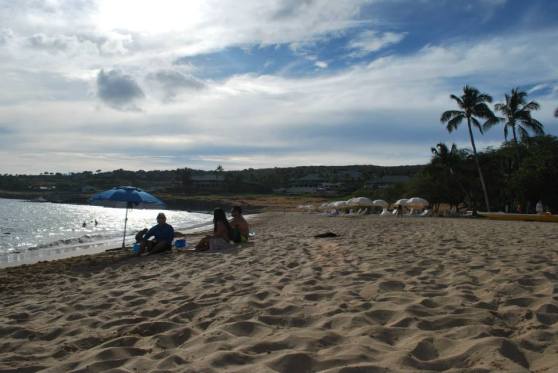
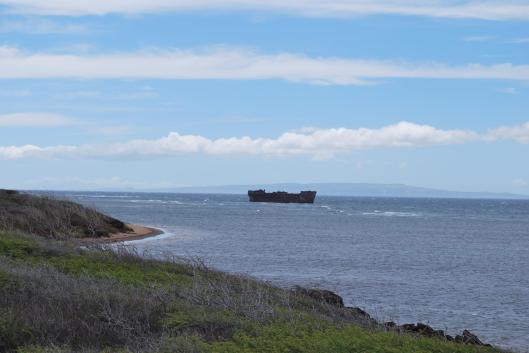
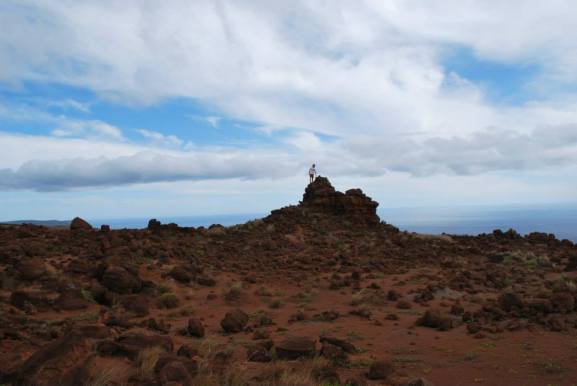
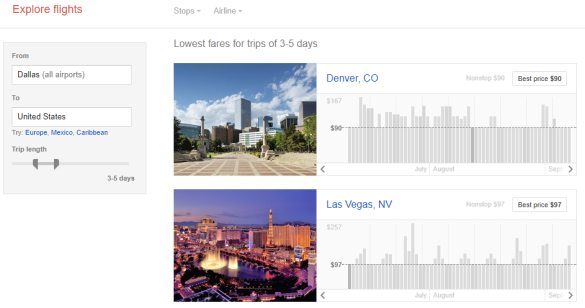
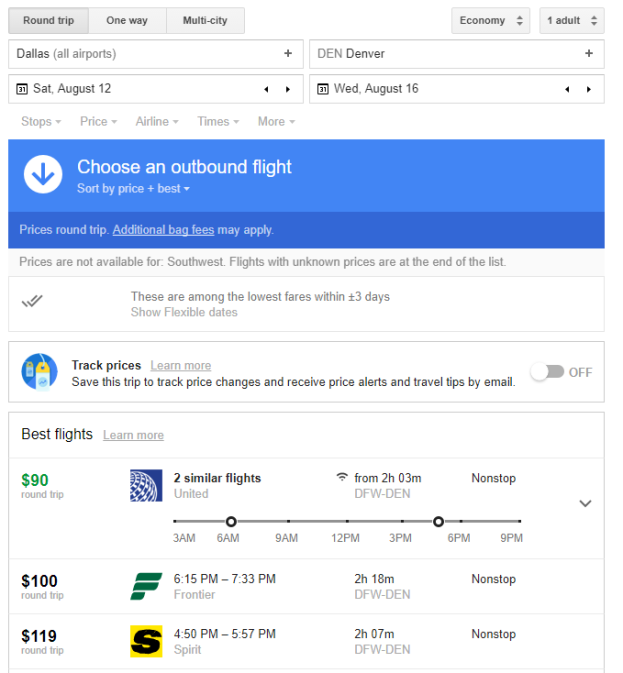
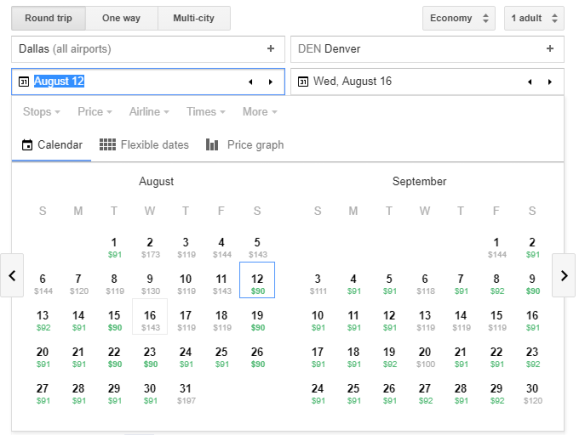
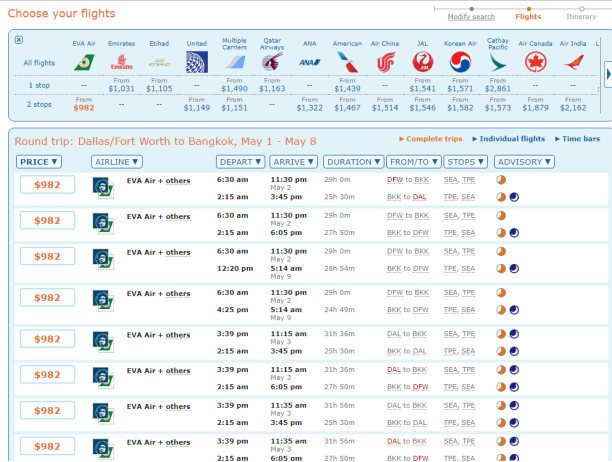

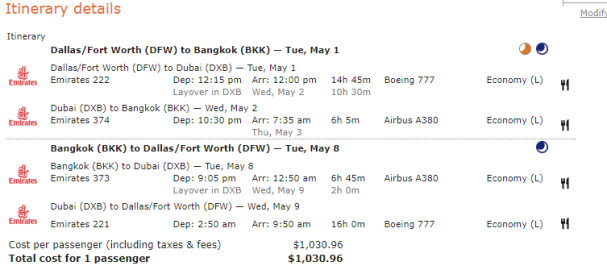
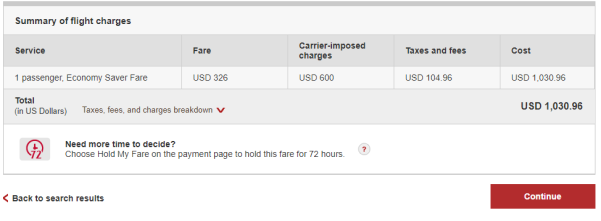
 This is a really great visual representation if you care about the duration of your flight journey, or about your layovers. My favorite thing is to look for the big layover chunks and see if maybe I can sight-see a little somewhere. In the above example, you can see the gray DEL bars in the middle are really long. This is almost a 22 hour layover in Delhi! It’s way too expensive in this case to be worth it, but if it was only a few dollars more…..why not?!